Tuesday, February 28, 2017

Remodeling The Van: Panels


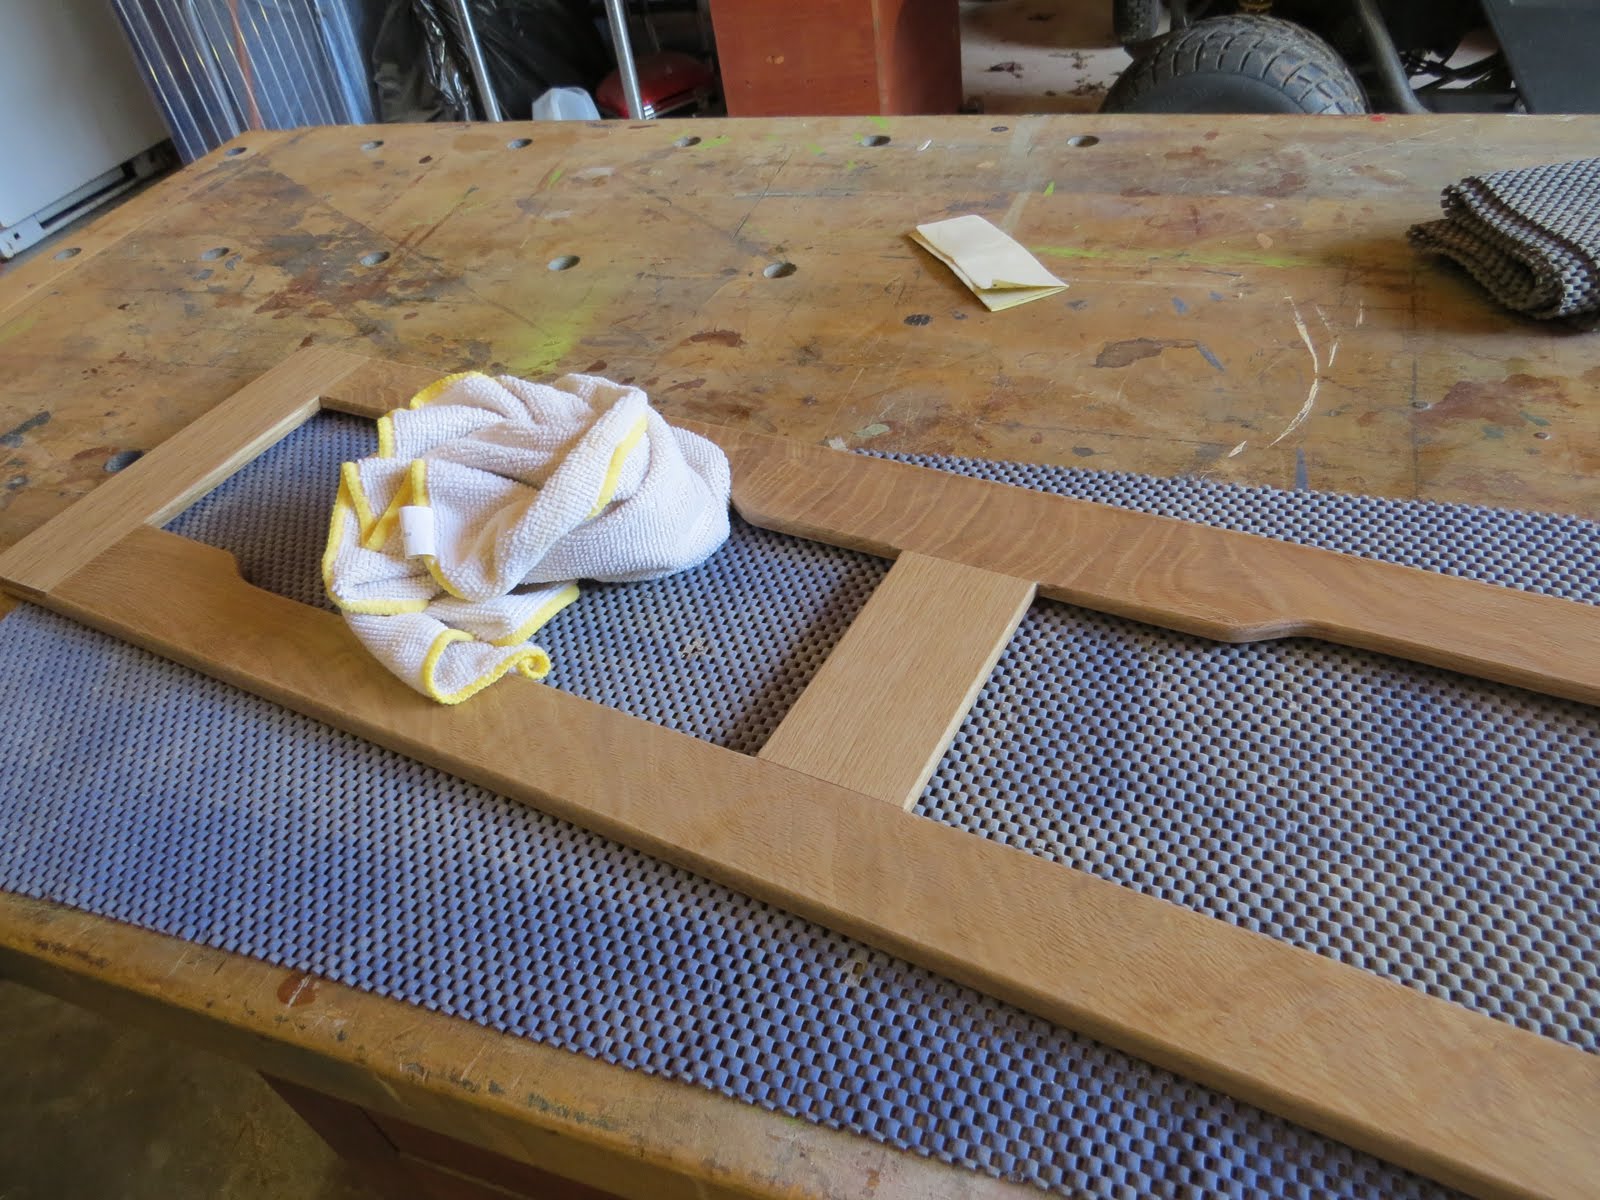
Getting the frames, including all those ebony plugs, completed is all well and good, but they only make up half, if that, of the cabinet doors.

The next step is the panels that go into those frames.

The lower cabinets get a different type of panel than the uppers, so I'm going to leave door #6, an upper and the one we've been following, for now and divert to door #16 which is one of the lowers.


The lower cabinets all get solid panels but I was having a terrible time finding an appropriate, and affordable, straight-grained  quarter inch ply to make the panels out of. Then one day I was in town and poking around one of the big-box DIY stores when I wandered over to the luan rack.

Luan is a really inexpensive plywood (Which is why it's used so often as a sacrificial floor protector during construction projects and is a material of choice in lower-end travel trailers and motor homes.) usually made with a southeastern Asian hardwood, though there are no set standards for what wood is used in the making of it other than the wood, as well as the glue, has to be inexpensive. (Leave raw luan out in the weather and it will explode all over the place within days.)

But, because there are few standards for the making of luan it varies greatly and sometimes you can find a batch that looks pretty good. That was the case for me that day. I didn't set out that morning planning to come home with about 25 sq. ft. of hand-picked luan that cost me $20, including tax, but the other alternative was the $250 (Plus really expensive shipping) quarter-cut White Oak ply from the specialty hardwood supplier that I was beginning to think I would have to resort to, so I was willing to make some compromises.

.

As you would imagine, quarter cut veneers have the same vertical grain that quarter sawn lumber has, but Luan is always made with much less expensive rotary-cut veneers which means it has some of the cathedral grain pattern that I was trying to avoid in order to stay true to Arts and Crafts, but by carefully picking out where to cut the panels from the sheets I was able to minimize that 'feature'.

This particular luan also had a reddish tint that I hadn't originally planned on, but it helps the panels stand apart from the frames giving the doors depth, (Or so I'm telling myself.) kind of picks out the reds in the rugs and backsplash (more desperate justification,) and actually finishes out (With the same Polycrylic I used on the door frames.) to more of a warmish red-brown, so I let that go as well. (It feels ridiculous when you're doing it, and I always try to make sure no one sees me, but to test what a clear finish will look like at the lumber yard before you buy, just lick the wood. . .)


Of course just slapping a panel of finished luan into the frame is pretty plain and boring, as you can see two photos ago, definitely not in the spirit of Greene and Greene, so some embellishments were in order.


Embellishments that required a lot of shop-hours!

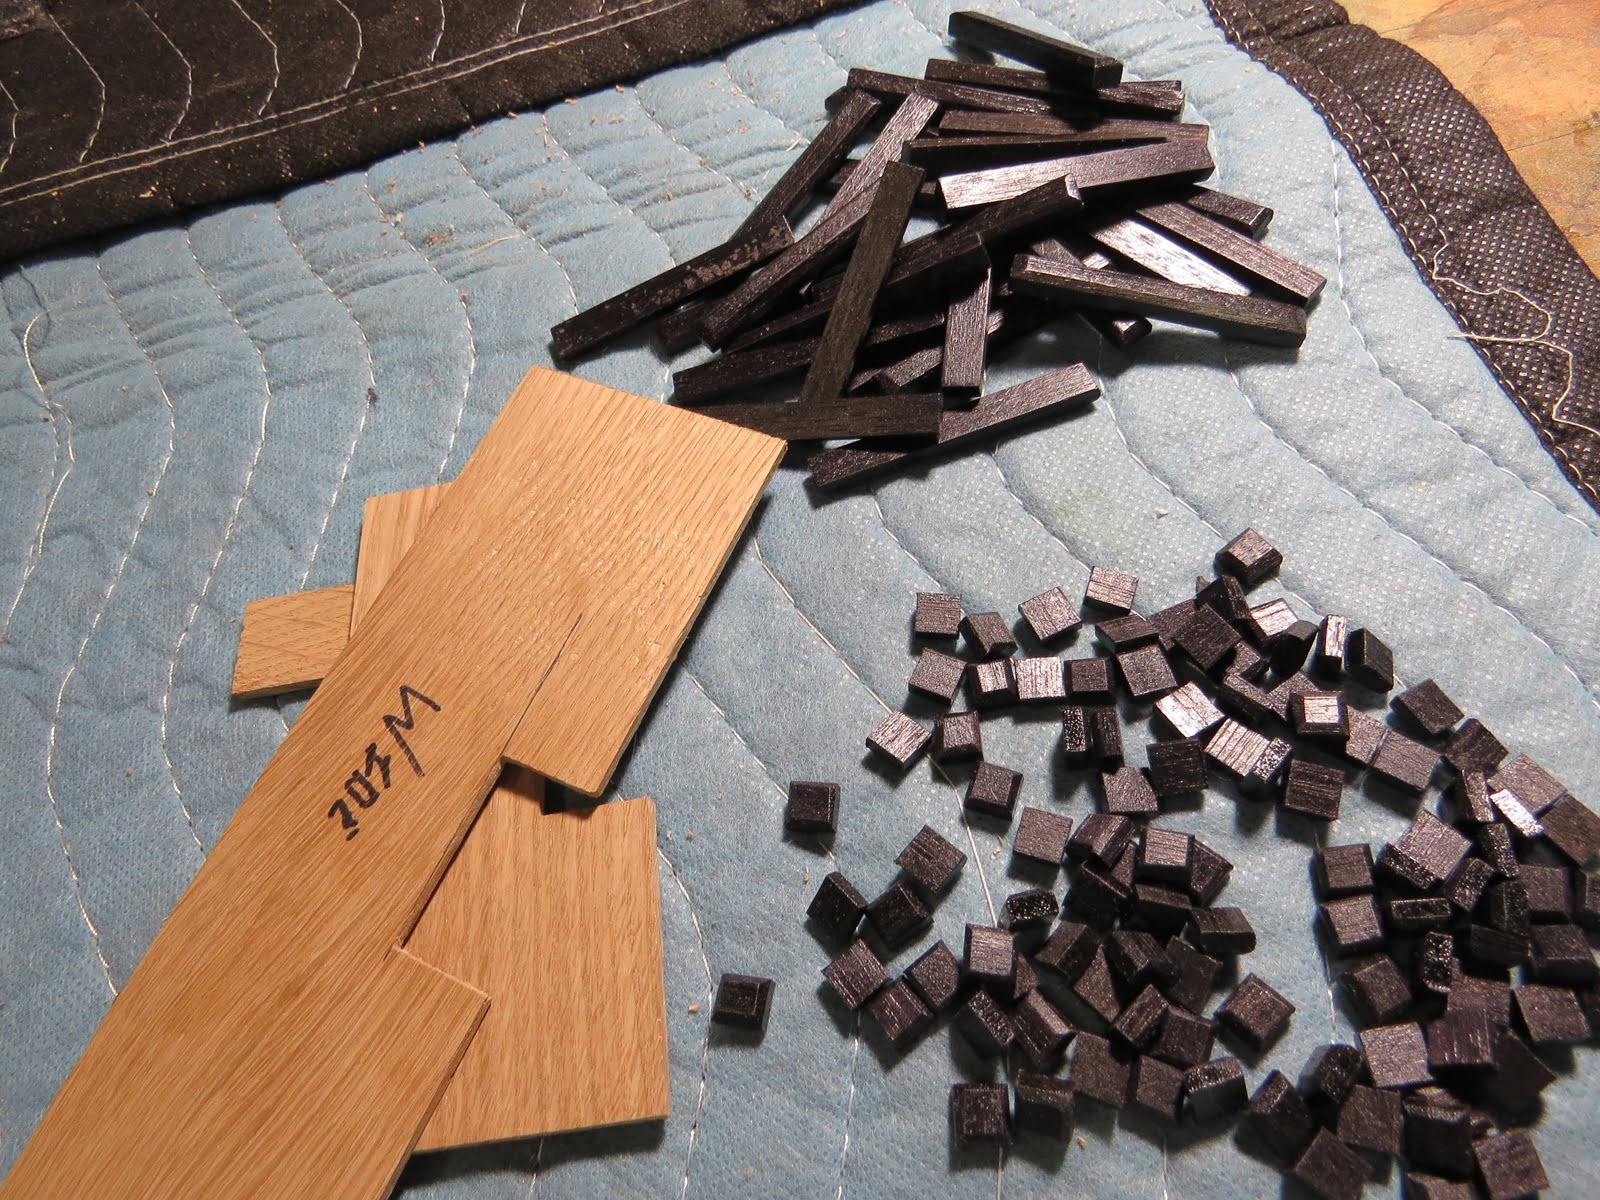
I started by cutting some of my White Oak into quarter inch wide, 1/8th inch thick strips. I then trimmed these strips into the pieces necessary to mimic the linear outlining used so often on the panels of Arts and Crafts light fixtures. Finally I gave the pieces the ebonizing treatment.

This time I did not do the tea pre-soak, and because I used White Oak which is a little less tannin-rich than Walnut the ebonizing produced a warmer, less saturated black than what I have on the plugs. The difference probably doesn't show much in these photos, but when viewed directly it's noticeable, at least to me.


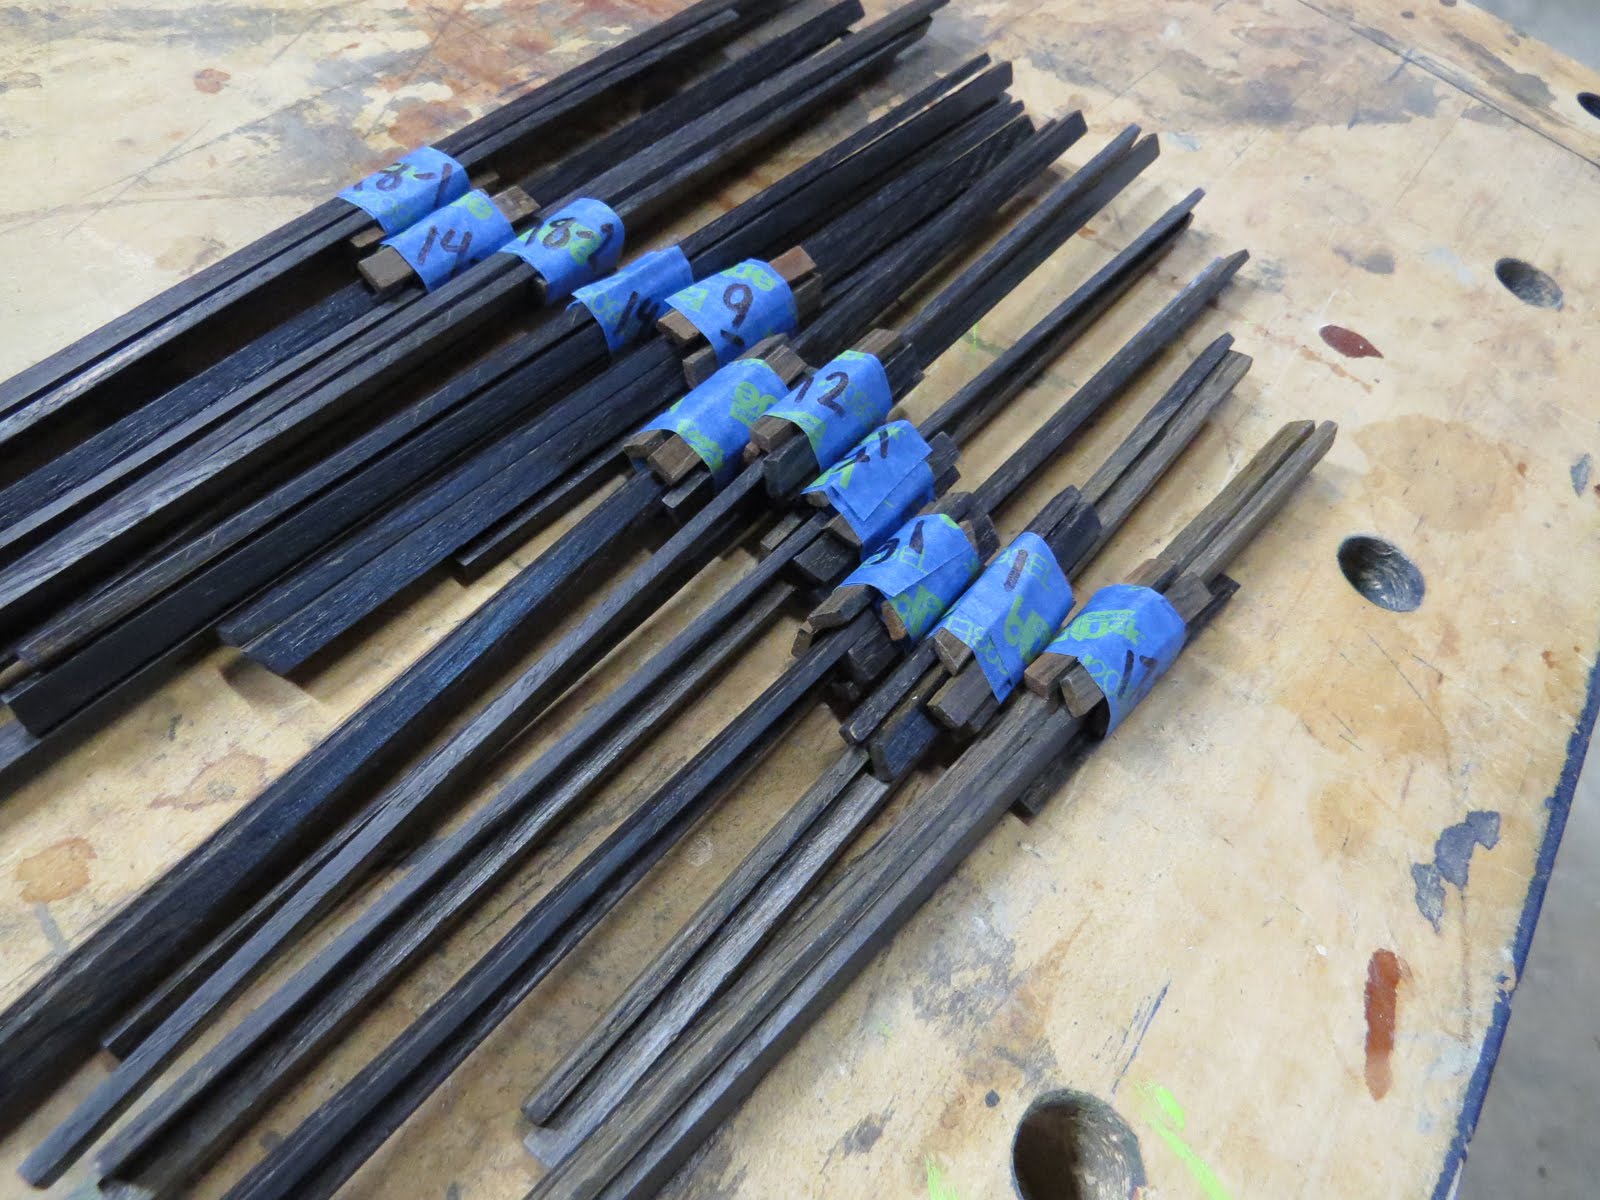
Also, as I was ebonizing and sealing them, because each panel is unique, I had to very carefully keep track of the 'sets' of fitted strips and make sure they all ended up back on the same panel they were originally fitted to.


The last strip-step was to glue the strips to the pre-finished panels using spacers and super-glue.


And for a final little bit of playful punch, I put a 20 degree bevel on one end of a half inch thick block of White Oak, sliced the block into a whole bunch of 1/16th inch thick strips, finished them clear, measured for length, added a 45 degree bevel on the other end with my chopper, normally used when building model railroad stuff


and finally glued them to the panels using spacer blocks to get them in the right place.


OK, now that I have the panels for the lowers covered;  back to door #6:


The upper cabinet doors get plastic panels. If this was true Greene and Greene the panels would be glass but there's a couple of obvious reasons that wasn't such a good idea in The Van. Besides being expensive, and breakable, glass would be pretty dang heavy, so plastic it is.

Originally I had in mind something like the textured amber panels Dad used on the cabinets when he built the wet-bar in the downstairs recreation room of our brand new house in the 1960's. Only it turns out that stuff isn't very popular nowadays and is pretty much impossible to find.

At one point I thought I hit the jackpot when I found someone that had bought hundreds of plastic panels with different mid-century designs and textures that had been stored untouched in a barn for a half-century, and this person was right here in central Texas! Then I noticed that the posting was a couple years old and by the time I contacted him all the panels were long gone, sold off in ones and twos to designers and old farts like me desperate to recover some of the stuff of our childhood.

So I was just going to have to make do with simple, clear acrylic panels instead. (I could get tinted acrylic but the colors are more neon than what you'd ever find in a 1900's Craftsman house and the price puts them way outside my budget.) I cut up some sample pieces of the clear and played around with various ways to tint them amber, but nothing worked, unless I was willing to settle for smeared, streaked and blotchy results that looked like they came from a first-grade art class. (Assuming the school district still has funding for art classes, which is unfortunately, and in my opinion, disastrously, becoming rare.)

So my final 'test' was to see if frosted-glass spray would eat away at the plastic. By all rights it should. The spray contains acetone, n-butyl acetate, xylene and other petroleum crap, all stuff that normally eats plastic for a snack, so I wasn't too hopeful. But for some reason all it did to the acrylic sheet was exactly what it was supposed to do, leave behind a clean, dry, frosted-looking surface.


So with a plan in place I cut the 16 panels needed for the upper cabinet doors and used 1/8th inch tape to mask out a linear outline similar to what I put on the lower cabinet door panels.

The little bit of blue masking tape which is stuck to the protective coating still on the other side of the acrylic tells me which opening of which door this particular custom-fit panel fits.


Now at this point any reasonable person would spray the frosting on, strip away the masking, and call it a day, but - well - you already know how this is going to go. . .


As I may have already mentioned a time or two, I'm really attracted to lighting fixtures of the Arts and Crafts movement, especially when they incorporate a natural element such as the leaf clusters above, and I figured here was my chance to bring a little of that sort of design element into The Van.


Now I did manage to keep it somewhat reasonable and used rather simple designs for the panels that aren't always in eye-sight.  Of course in the confines of The Van this is limited to the two cabinet doors tucked into the rear of The Van.

For these simple designs I laid painter's tape on a scrap of acrylic, gave the back of my printed design a very light spray of adhesive, just enough that it would stick down to the tape but not so much it wouldn't just peel right back off again.


Then all I had to do was cut the pattern


peel away the paper, then the excess tape.


And finally lift the mask off the scrap acrylic and position it on the target panel.


But most of the cabinet doors are pretty much in-your-face all the time, including door #6, and I wanted something a little more elaborate for those panels.

Something too elaborate to peel off some scrap acrylic and reposition onto the panel, so for those I had to cut the mask right on the panel itself.

That was a slow, nerve-wracking process. Not enough cutting pressure and the mask would tear rather than lift cleanly away, but since acrylic is pretty soft too much pressure on the knife would cut right into the panel. Then if that wasn't enough, there was the potential  disaster that would occur if I slipped and laid a nice deep, un-hideable scratch across a panel.


But somehow I managed to avoid having to remake any of the panels


Although I have to admit, I did get a little carried away with door #7.  Being right over the kitchen counter, not only is this door pretty much always visible, but it's right in my face much of the time I'm in The Van, so I wanted something really interesting for these panels.

At this point in the photo above I have about 5 hours put into cutting this mask of a classic Monterrey Cypress and I'm still not done yet!

After cutting each of these masks I  pealed the paper off and left just the tape behind because I wasn't sure how the 'frosting' would react with the paper or the inks on the paper. and didn't want to take any chances.


Finally, after hours of painstaking cutting and a hunched up back that would make a whole gaggle of strip-center chiropractors drool, it was time to frost my panels. (I was all hunched and twisted up because I'm near-sighted, with a natural focus of 4 to 10 inches off the end of my nose, so when doing detailed work like cutting these masks I take my glasses off and shove my face right down into it, which is good for the work, not so good for the back. . .)

I laid down 4 light coats of the frosting. The directions say that recoating can be done pretty much right away, so I sprayed the coats just a couple minutes apart. This stuff dries quickly so in an hour it was ready to be handled gently.


First the striping tape came off,


followed by the design masks,


revealing panels pretty much as I had envisioned. Thankfully those wrinkles at the bottom left are from the protective coating which is still on the back-side of the panel and not some unwanted 'feature'.


Pealing some of the masks off was a little bitter-sweet though. This mask took me nearly 6 hours to create,


so peeling it off was almost painful,


and in just over 6 minutes it was history. . .


With the panels set one last time into their final positions in the frames I was, at long last, able to remove the last of the protective coating


and lay a bead of acrylic calk around the edges to hold them in place.  This way if I ever need to remove the panels it's a simple matter of cutting the calk away. The calk is white now, but will cure clear. The cans are there to make sure the panel sits snugly in the frame while the calk cures.


Thursday, February 23, 2017

Remodeling The Van: Ebony And - Well - More Ebony


Alternative title:

If I Make One More Plug I'm Going To Go Nuts!!!

(OK, for you sticklers out there, I mean more nuts than I already am.)

Anyway, last time, frames, this time plugs


A prominent feature of Greene and Greene is Ebony plugs locking the joints together, such as you see in the chair to the left.

Sometimes lots of Ebony plugs!!

Now I could go to the specialty hardwood distributor and buy a chunk of Ebony and cut plugs from it, but the distributor is a long ways away and Ebony is really expensive, so I went old-school instead.


This awful looking mess is a quart jar that I dumped some steel wool into then filled 3/4 full with common 5% white vinegar.

After leaving this concoction to cook for at least a week, and two is better, you end up with a solution of iron oxide. (And lots of other gunky looking things!) What you don't want to do with this jar is screw the lid on tight while it's cooking because the reaction produces gas and you really don't want this jar to burst and spread that solution all over.

The iron oxide solution reacts with tannin. Tannin is found is just about anything, especially in certain hardwoods. When the iron oxide and tannin get together the chemical reaction results in a rich, deep black that is embedded right in the cells of the wood fibers as opposed to stains which soak in around the wood fibers or paint which sits on top of the fibers.


But before I can ebonize them, I need plugs, about 200 square plugs as well as nearly 60 rectangular plugs.

Above is a small sampling of my first try at making the square plugs, but I wasn't happy with them because - well, frankly they sucked - so they got tossed into the burn pile (Yeah, that sucked too.) and I started over again.


I was much happier with the look of my second attempt at the square plugs; but not so much with the making of them. . .

Cutting some scrap Walnut into 5/16 inch wide, 3/16 inch thick strips. Admittedly, 1/8th inch thick strips would have been better but that was just too thin for my fat fingers to handle the plugs during the upcoming beveling step.) I then cross-cut those strips into 5/16 squares; lots of 5/16 squares! which was simple, but putting the 45 degree bevel on the four top corners pf each little square was a pain.  Literally, since for each of the 4 bevels on all 280 square and rectangular plugs (I made a few extras to avoid having to come back and do this again.) I had to pinch the plug between forefinger and thumb, touch a corner to the running belt sander which I had clamped upside down to my bench, then turn the plug 90 degrees, re-pinch, sand and repeat, over and over and over - and over - again. That's over 1000 bevels I had to sand in and by the time I was done my thumb was bloody from being sanded on as well. Out of desperation I tried a bandaid, oops, I mean an adhesive bandage, but as you would expect, I just couldn't get a grip on the plugs with that thing on there so I continued to sacrifice skin-cells and blood for the cause. (Hey! I never said I was smart!!)


But eventually I had all the plugs milled up and ready for the ebonizing process.

The jar on the right is my well-cooked iron-oxide solution, the jar in the middle is the same solution poured through a filter to remove the gunk and remaining bits of steel wool. The jar on the left is really strong tea.

No, I wasn't using it as a refreshment! Even though I was using Walnut for the plugs, which is naturally high in tannin, I pre-soaked the plugs in the tannin rich tea, the lidded plastic container on the left, which helps ensure a good strong reaction during the next step.  Which, after a quick shake to dislodge excess tea, was to dip the plugs in the iron-oxide solution, the smaller container between the two paper towels. I then carefully laid each plug out to let them 'cook'.

This is a chemical reaction and the pieces don't instantly turn black. It takes a good fifteen minutes for the full effect. You can see that the plugs on the right-hand paper towel, while not their final deep black yet, are darker than the ones on the left. That's because they were dipped first and the reaction is a bit further along.

Once the wood is dry the reaction stops and if it isn't dark enough, a second round of dipping will deepen the effect. I didn't need a second dip since, as you can see in the photo below, one time was enough to get a good, deep black that's penetrated so far into the wood that it would take some serious sanding to get it back off.

Oh by the way, remember when I told you pretty much everything has tannin in it to some degree or another? That includes skin and many fabrics so I suggest if you try this that you wear nytrile gloves and old clothes!!!


My plugs didn't need a second dip, but I did have to get a protective finish on them. Since the dang things are so small I did this by dipping a few at a time right in the Polycrylic then rolling them around en-mass in a paper towel to suck most the finish back off again.


Of course these plugs aren't doing me a damn bit of good until they're mounted.

To help with getting the square plugs placed properly I made a couple jigs for the two different widths of joint they would be mounted on.


The actual mounting was done with superglue. I put the jig in place, pick up a plug and orient it with the long grain of the plug parallel with the long grain of the frame part it will be glued to, (Carefully done by craftsmen of the past so they both move together in reaction to humidity levels rather than fight each other.) put a tiny, very tiny, little dot of superglue (CA) in the center of the plug, carefully position the plug with the jig, then hold it there for 30 seconds before going onto the next plug.

Since I had not particular interest in counting 1 one-thousand, 2 one-thousand, 3 one-etc, etc, a few hundred times I used the stopwatch on my phone to keep track.


Most of the rectangular plugs flank the pulls (I'll get to drilling and mounting the pulls in another post.) and for those I used a simple half-inch spacer to get them set the right distance away from the knob but then just eye-balled where each one went from that point.


In the mortise and tenon joint of a century ago, before glues were so effective, the plugs served to lock the tenon into the mortise by being driven right through all the parts of the joint. This dictated the placement of my square plugs. Most of the rectangular plugs are pure decoration, (OK, I know it sounds more sophisticated if I say they are 'design elements', but that's pretty much the same thing isn't it?) but a few of both kinds of plugs actually cover fasteners. If I ever need to get at these fasteners in the future a sharp rap to the side of a plug will snap the super-glue bond.

Remember, if I manage to damage a plug I have spares. and after all the work and blood it took to make them I will Not be tossing those spares into the burn pile!!


Next time, panels, 36 of them and each one custom fit.


Monday, February 20, 2017

Remodeling The Van: Door Frames

I'll pre-apologize for the long post. Due to the subject it couldn't be helped. Fortunately there's lots of pictures to ease the way.


Got my design. Got my raw materials. Now all that's left is some shop time!!

Most woodworking projects, especially cabinet doors, require straight lumber, so when you buy S2S random-width lumber you have to true up the other sides, edges 3 and 4, of the boards to get them straight and perpendicular to the face. (Technically S4S, like what you buy at the big-box store, already has this done, but that's still no guarantee that the board will be straight and the edges square.)

In addition to squaring the edges up, wood, being a natural material, tends to do it's own thing and sometimes boards need some serious straightening too, like the one above.

Rather than turn a lot of wood into chips trying to straighten out a severely curved board like this, it often pays to cut the board into shorter lengths so there isn't quite so much curve to take out of each segment.

I cut this board into two segments about where the tape measure is sitting and had much less curve to deal with on each one.


By the way, every step of this project can be done by hand or with basic hand-held power tools, and in my younger days I've done just that, it just takes longer. Fortunately, now I have a few larger tools in the shop that speed things up, such as this jointer.

The dead-flat surfaces on each side of the blades, which are under the red blade-guard, are in plane with each other


The blades are exactly even with the left-hand surface 


and for this project I have the surface to the right set about 1/32nd of an inch below the blade level.

By passing the edge of the board, which is held exactly perpendicular to the blades by a fence, (behind the board three photos ago.) across the right-hand surface, through the spinning blades and onto the left surface a 32nd is shaved off the high spots. After a few passes there are no more high spots and the edge is squared up and straight.


With one edge prepped, now it's time to turn that wide board into the rails and stiles I need for my cabinet doors. For this project the widest point of both the rails and stiles will be 2.25". With 18 doors to build I've got a lot of lumber to turn in rails and stiles so I made a template exactly the width I needed.

I don't care how careful you are, there's always going to be some error when measuring with a tape or rule and marking with a pencil. With a template, I only have to measure once and if there is any error it will be transferred evenly to every rip-cut I make.


For this particular board I was able to get three pieces out of it with only a little waste left over.


By the time the 1" thick boards have been sided and delivered to me they are just a shade thicker than 3/4", but for this project that was still too thick.

In the confines of The Van, cabinet doors 3/4 of a inch thick would look heavy and clunky. Which kind of clashes with the sleek and craftsman look I was going for. So what I need now is to get my boards down to a half inch thick.

Cue the bandsaw!

First I pick the good side of each board, lay that side down on my table-saw which is a dead-flat cast-iron surface, lay my pencil on the top of a 1/2 inch brass setup bar and run it down the length of the board leaving a mark 1/2 inch from the good surface.

Then I take the board to the bandsaw where I set up my resawing fence, (When you slice a board to make it thinner it's called resawing the board.) a rounded hardwood surface exactly perpendicular to the saw's table and set directly opposite the cutting edge of the blade.

The face of the resawing fence is rounded so I can 'steer' the board through the blade, (Bandsaw blades tend to alter their angle of cut slightly depending on the tension and sharpness of the blade, density of the wood and how hard you're feeding the wood into the blade. 'Steering' the wood compensates for these variations.) and slice the board to near the proper thickness by following just to the waste side of my pencil-mark. (The thin piece is saved for other projects of course.)


This is about 65 linear feet of 2.25" material for rails and stiles, not quite half of the total I need for this project, so there was lots of resawing to be done!!!


And after the resawing I ran each board through the planer for a couple passes which fine-tunes the thickness to exactly 1/2 inch and removes the band-saw blade marks at the same time.


Then it's back to the table saw where I get rid of the rip fence (Because of my template I can put it right back where it belongs in a matter of seconds.) to make room for the miter fence, which is set at exactly 90 degrees. Here's where I start cutting the milled boards to length.

Since I'm cutting boards to length it seems like a good time to talk about measurements. When I was doing up the drawings I went out to The Van, a lot!, measuring each cabinet door one at a time, writing the measurements down, then remeasuring that particular door again, checking against what I wrote down to verify I got it right, then I transferred those measurements to the drawings.

When I get to the stage of the project where I'm actually cutting things I take these double-checked measurements back off the drawings, write them down, go back out to The Van and confirm one more time that I have them right by measuring the door again.

Then I measure and mark the board for each cut. But before making the cut I go back to my notebook, verify the length I need, and finally go back to the board and recheck one last time to make sure my mark is in the right spot.

After all that I finally make the cut.

Seems like a lot of checking and double-checking, but this routine is one I've developed out of self-defense after a lot of experience, and not all of it happy experience. It helps me minimize making cuts in the wrong places. Often when I pull such a bone-headed stunt I don't discover the error until near the end of the project when I'm trying to make all the pieces fit together properly and it takes a lot less time to double and triple check everything before cutting than it does to go back to the beginning and start all over again! (Which is bad for moral too!!)


OK, I've made my cuts and finally have the three stiles, the shorter pieces that will be vertical when the door is mounted in place, and the two rails.

I only cut the parts for one door at a time, again, to minimize mistakes and confusion.

Now I take and lay the parts out, checking faces and grain to make sure I have the best sides showing. I switch things around, and sometimes around and around, until I'm satisfied with the look.


For the next several steps I'm careful to only work with one piece at a time, keeping the rest laid out where they go.

Here I've turned the left-hand stile over and marked the ends of the stile, and matching ends of the rails, for the waste part of the half-lap joints I will be using to fasten them together.

Arts and Crafts pieces are known for their joinery, mortise and tenon, dove-tail, finger, etc. but with my doors being only a half inch thick there's really not enough meat in the joint for anything too fancy, so I've chosen to fall back on the tried and true half-lap.

Don't get me wrong, I actually like the craftsmanship required for building the fancy joinery, which, in the days before decent glues, were necessary to get any sort of strength and longevity out of a joint, but now days it's easy to get a long-grain to long-grain glue-bond that will last longer and is stronger than the wood around it.

Besides, I've got 96 joints to make for this project and if I get too fancy with them I'll still be working on it by the time we make our next questionable pick for President! (Oh crap! If he reads this he'll be ordering me to shut my blog down because now apparently speech is only free if he likes what you say!!)


Full half-lap joints


only require four simple cuts, two on each piece being joined. (Though I will need to take the time to clean up that inside corner on this one with a chisel in order to get a good tight fit.)


As I was saying before I interrupted myself, four simple cuts per joint.


And I even have a jig for the tablesaw that makes the two most difficult cuts easy.

That takes care of the 72 full half-laps.


The other twenty four joints, for the 12 doors that have a central stile or rail, are blind half-laps that don't go all the way through, but they are only slightly more complicated to make so no big deal.


But before I can get a proper measurement to make these blind half-lap joints I have to cut the cloud-lifts. Since I also have a lot of these to cut I made a simple template for marking them out and the jig saw makes quick work of removing the waste pieces.

I try to stay reasonably accurate here but don't obsess over it because it is, after all, a hand-made piece. Which is why I have to get this step done before cutting and fitting the blind half-lap joints since no two are exactly alike and trying to cut them according to the drawings, which are computer-rendering accurate, is a sure way to a mess.


With all the joints cut it's finally time for assembly. One good thing about using half-lap joints is that the waste left over from cutting the joint automatically makes great clamping blocks,

So the good news is, the small thin squares, when placed between the clamp and the frame, prevent the clamps from marring what will ultimately be finished surfaces. The bad news is that they more than triple the number of separate pieces I'm trying to control during final assembly, all with only two hands, which can be quite the Chinese fire-drill!


I've done one hell of a lot of gluing over the years and have developed my own method for applying it that works pretty well for me.

I lay a bead of glue on one surface of the joint then use my finger to spread it evenly, and thinly, (More is not better!) over the entire surface. It's a bit messy but nothing I've tried is as simple, accurate, quick and just plain handy, as a finger. I then take the excess glue that's on my finger and wet down the mating surface of the joint. I'm not spreading a layer of glue at this point, just pre-wetting the grain so glue will penetrate well when the joint is clamped.

By the way, spreading the glue like this is not just an affectation. Years ago testing by one of the woodworking magazines showed that just squishing a bead of glue between mating surfaces, one of the more popular gluing methods, makes for a joint noticeably weaker than when the glue is spread out first.

The trick here is to get just enough glue laid down for a tiny bit of squeeze-out all the way around when the joint is clamped. The squeeze-out ensures I've got good glue coverage but any more than the tiniest bit is just that much more that has to be cleaned up.

Just how much glue is enough but not too much depends on several variables, including the weather. (No, seriously! Like when adding water to cement, varying humidity levels will change the amount needed.) Experience is the only way to get this just right, in the mean-time I have damp (not wet because too much water migrating into the joint will weaken the glue-bond!) rags handy because believe me, you do not want to leave gobs and smears of excess glue to cure on exposed surfaces because even after vigorous sanding it will still show through a clear finish, especially if you're using a dark stain first.

When clamping my goal is to draw the surfaces firmly and evenly together in all directions, but not gorilla the damn thing which could squeeze out so much glue the joint is weak, not to mention distort the wood, creating a built in twist.

Finally it's starting to look like a cabinet door!! Though that photo above might remind some less of a cabinet door and more of a survivor of a major skiing accident laying in intensive care all bound up in a complicated and scary-looking contraption that's trying to hold them together while the drugs take hold.

After this has cured in the clamps for at least a couple hours I take a belt sander with 80 grit paper to even up any irregularity in the faces of the joints, then an orbital sander with 60 grit followed by 100 grit to remove the scratches left by the belt sander. I start with the courser 60 grit in the orbital sander because by nature belt-sanding leaves deep, linear scratches that are very noticeable and would take forever to sand out with 100 grit alone.


There's still some hand sanding to do before I'm done, but first, because the half inch thickness of the stiles and rails doesn't leave enough meat for the dado, or groove, needed for floating panels, I'm setting my panels in simple rabbets made in the backside of the doors.


Making these is pretty simple using the proper bit with either a handheld router or, as I did, on a router table.

I just have to make sure I keep things right side up when I'm doing this so the rabbet ends up on the proper side of the door!!.

By the way, so far we've been following the making of door #6, which is the upper cabinet over the driver's compartment. Since each door is custom, but several are very similar, it's important to keep track which is why the door is numbered with tape.


 But there's still a few more steps to go before I can worry about fitting a panel into the rabbet I just made.

Oak is very strong, but also hard and brittle, so the corners are sharp and prone to teeny tiny little splinters that you can feel embedded in your hands but can't see to remove, so now that the frames are getting close to completion I put my smallest round-over router bit into my trim router


and knocked off the corners, as can be seen in the bottom left of this photo. Just enough to take the edge off of them. I could have done this by sanding, and I still have some sanding to do, but this step speeds the process up a little.


Ok, I know this has been a long post and if you're still with me - well first - don't you have anything better to do?? and second, it's nearly over now.

A lot of woodworkers really dislike sanding, especially hand sanding which is how I do all my final sanding in-order to eliminate any sign of mechanical sanding. Me, I don't mind so much, which is good because there's a lot of hand sanding at this point, even though I'm only going down to 150 grit since I'm going for hand-made not that factory perfect - plastic smooth feel.

The final step of standing is to remove all the dust with a tack-rag. When I started out these were rags just barely dampened with heavily thinned varnish. Messy, expensive and prone to spontaneous combustion. Now I can go to the big-box and buy a bag of 18 microfiber towels for a few bucks that do the job even better and can be tossed in the washer with my dirty socks and reused.


My least favorite part of most projects is applying the finish, probably because I'm crap at it, but when it comes to a clear finish the lesser of all the finishing-evils for me is a hand-wiped, or ragged finish.

I really like Min-Wax Polycrylic for this. It doesn't have harsh solvents and dries crystal clear, unlike the admittedly tougher oil-based Polyurethane which takes a slight amber tint when it cures, and really stinks in the process.

Polycrylic also dries really fast! Other than the first coat, which I'll get to in a second, with the ultra-thin coats I rag on I can re-coat almost immediately.

Almost any finish, even oils, will 'raise the grain'. When this happens your carefully sanded surface suddenly feels like, well - sandpaper, all over again! And being water based, Polycrylic is really good at raising the grain, so I let the first coat cure at least 3 hours so it's good and hard when I take 400 grit sandpaper and lightly knock the grain back down again. Too much sanding at this point just exposes more raw fibers which will swell, or raise during the next coat.

Now that the wood is, sealed subsequent coats won't raise the grain much, if at all.

Oak is an open-pored wood so when I rag on a finish, especially the first coat, I make sure the rag is somewhere between damp and almost-wet to ensure plenty of finish, then I wipe it on using a circular motion with firm pressure, like I was waxing a car. This ensures I drive finish down into the pores. (I find spraying, rolling or even brushing tends to leave the finish laying on the surface, not getting down into the pores well at all.) Then, using a clean rag I try to wipe the finish right back off again with long, even strokes along the grain.

I'm going for a natural look and all I want of the finish on this project is enough protection to seal the wood and make it easy to wipe the doors down later with a damp rag to keep them clean. I certainly don't want a plastic looking and feeling buildup on my hand-made doors!


As I already mentioned, once the first coat has hardened off well I give it a light sanding with 400 grit paper to knock the grain back down then rag on two additional coats. Each one applied just like the first, as if I was waxing a car, then wiping it back off with long firm strokes of a clean rag to leave just a hint of buildup behind. This might sound counter-intuitive, trying to remove as much of the finish you just put on as you can, but believe me, there will be plenty of buildup left behind to seal and protect the wood yet not so much it doesn't look and feel natural.

I'm not sure why 3 is the magic number, but it just is. The first coat is going to get sanded to knock the grain back down so that's clearly not enough. The only way you might get away with only two coats is if the second coat is laid on heavy and very, very evenly. Heavily just doesn't feel right to me and I've never been able to achieve the necessary degree of evenness to get away with it anyway. But the third coat is like magic, giving the piece a nice even look without overdoing it. 

No matter what kind of finished look I'm going for, mat, satin, semi or gloss, I always use gloss for all but the final coat. The only difference between all these finishes is the amount of microscopic silica-type platelets that are in the mix, The platelets scatter reflected light and the more platelets in the mix the less 'glossy' the finish.

Thing is, I don't want layers of these platelets fogging up my natural finish so in this case it was two coats of gloss topped with a final coat of satin.

One last point. I made sure to cover every surface, even the ultimately hidden rabbets, with finish. Unlike the power-sucking suburban house which is climate-controlled to within a few degrees 24/7/365, the interior of The Van gets very cold, and very hot, and very dry and very humid, so I want to make sure the wood is well sealed on all surfaces to stabilize it. 

Don't get me wrong, I don't care how much finish you slap on, wood will always move and change in response to the environmental conditions, most notably the level of humidity, but a well sealed piece of wood responds to these changes slowly and evenly.

OK, that's the frame for door #6. Now I just have to rinse and repeat 17 more times for the rest of the doors! . . .


Next time, Ebony plugs, hundreds of them!