Tuesday, March 29, 2022

The Good, The Bad, and The Irony


And before anyone goes all postal on me - yes, I am knowingly using the highly controversial Situational Irony in this instance, so spare me the long running debate on the proper - and improper - usage of irony.


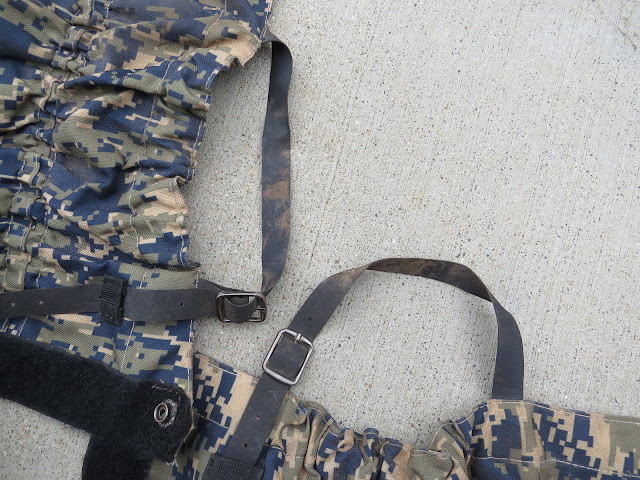
Is it bad that I have a flat tire on my air compressor?

Yeah, I'm pretty sure that's bad!

Actually kinda really bad!

As consumers I believe we have a moral obligation to ourselves, our society, and our planet to take proper care of what we have, no matter what it is, in order to make the most out of the money it cost and the resources the manufacturing and shipping of it consumed.

I'm usually pretty good about that. Hell! I'm still wearing work-shirts I had before I retired 10 years ago. True, the sleeves have been cut off to repurposed them for retired life out here on the property and most of them are seriously sun-faded, paint and glue spattered, and well-frayed around the edges, but they're still serviceable. As The Wife pointed out just the other day after we had watched a short segment about the Paris Commune revolt in PBS's Around the World in 80 Days - "The way we dress nobody would ever mistake us for people with money!"

But I'll admit that I could do better sometimes. And this! Letting a tire on my air-compressor go flat - the first step to ruining a perfectly good tire - is not only situationally ironic, but very, very bad!

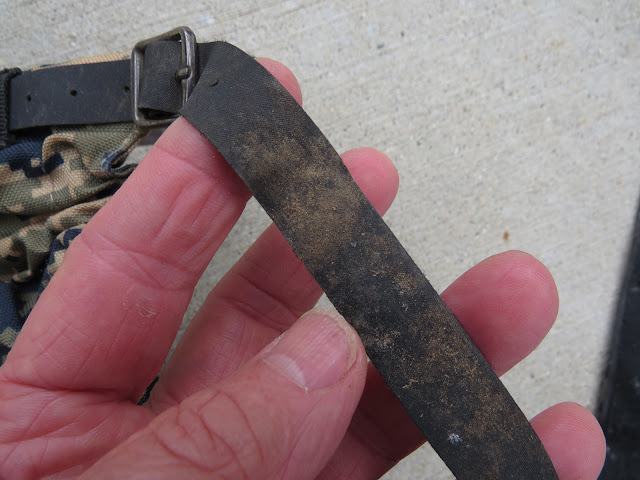
On top of that I had recently let all the air out of the compressor's tank, so short of getting the stomp-on manual bicycle pump out of The Van I was pretty much stuck at the moment.


So that covers the Bad and the Irony, but what about the Good?

Well this is the same tire about a week after I finally got it re-inflated, holding air and doing its job. Obviously I didn't ruin it - this time - and that's good.


This is the reason I let all the air out of the tank in the first place.

That little gizmo with the black knob and gauge on it is the regulator.

It determines how much of the 150 pounds of air in the tank are allowed through to the air-hose.

Pressure regulators have been around, largely unchanged, for a few hundred years.

It's a relatively simple device where pressurized gas or liquid enters the input side of the aluminum block (top left) where, encouraged by that silver spring, (bottom right) a small piston (bottom center) pushes up to seal off a port between the input and output sides of the block. On the other side of the port that large black seal (left center) tries to open the port by using the little nubbin in the middle to push down on that brass extension of the small piston.

How hard it pushes is determined by that large black spring and the threaded fixture to its left. The black knob on the assembly to the right is used to turn the threaded fixture which adjusts the push of the large spring.

A little bit of push and the piston opens the port until a small rise in pressure in the output side of the block presses against the large surface area of the black seal and pushes back against the black spring until the piston closes the port again, stopping any further rise in pressure on the output side.

The harder the black spring pushes the more pressure required in the output side of the block to push the black seal back far enough to close the port again.


As you might guess from the state of the housing that guides that all-important piston, my regulator wasn't regulating anymore.

Instead the piston was never closing the port which meant I had a full 150 pounds of pressure on the output side of the regulator. Not only is this kinda hard on the piping and hoses, but it also made using the quick-connects a bit challenging!

In addition to that, the large black seal wasn't sealing in the bonnet properly anymore which meant that pressure was perpetually hissing out through the adjustment-knob assembly.

Now I know I could have bought a rebuild kit for less than $30 (less that $20 for a junky kit) but understanding how a regulator works doesn't necessarily qualify me as a competent repair-er of said regulator, so for less than $50 I bought a complete replacement.

I count that extra $20 as insurance towards getting the job done right the first time.


And while I had the compressor out to replace the regulator I took the opportunity to remove the shrouds and give everything a good overall cleaning.

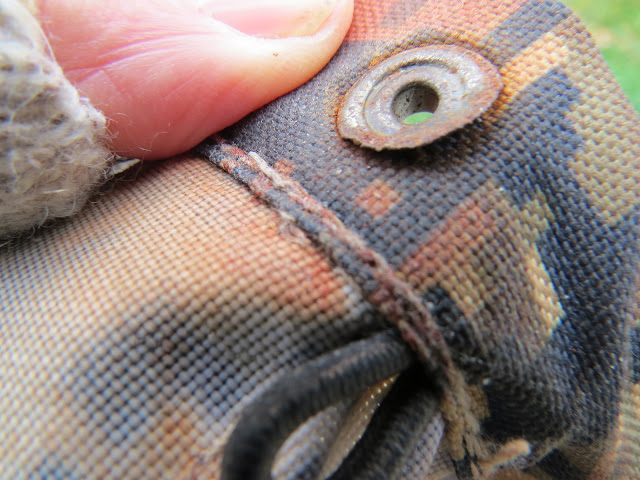
Mud-daubers are a fact of life out here on the property and they have a habit of building their fortresses in any little nook or cranny they can get to and the longer you leave a nest the more it encourages them to enlarge on it.


With everything cleaned up, the new regulator installed, and that tire aired back up, with the supreme confidence of the ignorant I rolled the compressor back to its normal station. (It lives up on those blocks to make it easier for me to reach underneath once a month to the valve that drains any water out of the tank.)

But with the caution of a skeptic I didn't hook the compressor back into the piping system right away (that fitting in the pipe just to the left of the air-pump's base.) and with a full charge in the tank I turned off the main switch.

Though they look like they could be one and the same in this photo, the compressed air piping terminates just behind the rolled up air-hose in a ball-valve I use to drain water out of this end of the piping (there's another one in the far end of the piping on the other side of the barn as well) and that white 'pipe' holding the air-hose is actually a modified and reoriented paper-towel holder. Confusing the issue even more is what looks like a bit of brass plumbing just above the coil of air-hose. Actually that's an oddly placed mud-dauber nest.


But three days later the pressure in the tank was still holding at 150 pounds and the output side of the regulator at 90 pounds, (The Van's rear tires take 70 pounds which dictates the pressure I need out of the compressor.) so by the luck of fools I must have got this job done right the first time!

So I turned the switch on, re-connected the compressor to the barn's piping system, and called this job done.

Now all I have to do is recover from the shame of that flat tire!


Sunday, March 20, 2022

Pike Trail Gaiters Save My Legs


 One thing that inexorably goes along with increased candle-count on the birthday cake is thinning skin and slower healing.


What's that got to do with anything?

Well much of the trail-system that I hike on a near-daily basis around the property is fairly well defined and largely obstruction-free from ground to around knee-level,


but the more open areas are choked with grasses and other, less benign, i.e. more pokey such as thorn-laden wild blackberry, flora that are often wet with dew in the chill of the mornings when I, and my aging-legs, tend to be out there,


and a lot of the trail-system is in the woods and the likely hood of getting tangled in more substantial, skin-tearing-able, objects at around ankle-level is high.

And while it's true that when I'm out doing any real hiking I wear long pants, here on the property my daily uniform of a hard-wearing kilt leaves my legs bare from the knee down.


So a while back I thought maybe I would try trading in perpetually scabbed legs for some protective gaiters. And perhaps save a little on Neosporin while I was at it.

(Apologies for subjecting y'all to the sight of my naked knee. I hope it wasn't too traumatic.)


To that end I selected this set of gaiters from Pike Trail and have been using them for about 8 months now.

Which in my case equates to some significant mileage, and, to my thinking anyway, also equates to the basis for a meaningful review.  - - Unlike those attention-seeking numb-nuts that write useless reviews such as "haven't tried it yet but the packaging was slightly crinkled so I give it a one-star deduction" ! 


As advertised, they, or at least the fabric the gaiters are made out of, is waterproof so they perform as hoped when wading through cold, wet vegetation, and the tough fabric does a much better job of fending off sharp, pokey things than my skin.

Of course, since I'm wearing them in all seasons, including summer heat, that water-proof bit means my leg-sweat collects on the inside just as fast as the dew on the outside, so they do get a little funky. But somehow warm leg-sweat, at least my own warm leg-sweat, is less objectionable than cold dew.

And since I'm not passionately opposed to trading a little funk for undamaged legs, and the gaiters do a good job of keeping them - my formerly scabby gams - pristine and beautiful - - - OK, beautiful might have pushed beyond the bounds of credibility, but you know what I mean - - I am calling this experiment a success.


Putting the gaiters on is easy.

They are ambidextrous so after hooking the adjustable foot-strap (Since I always wear the same boots I only needed to make this adjustment the first time I used the gaiters.) of the one nearest at hand under my arch. (with my boot already on of course) I then pull the gaiter into place around the back of my leg and with a quick, two-handed flip, press the full-length strips of Velcro - oops, sorry - hook and loop, closed up the front, and done.


People wearing normal hiking boots have the option of slipping the hook at the bottom of the gaiters over a boot-lace to assist the foot-strap in assuring the gaiter stays in place.

Since the barn-boots I wear around the property (old hiking boots that are too worn out for real trails) have no laces so I can slip them on and off easily, I don't have an immediate use for this little hook. Then again, I have also encountered no issues with the gaiters staying right where they belong even without it.


Speaking of staying where they belong: There's this elastic draw-string & retention clip thingy at the top of the gaiter so I can cinch them snug above the shapely swell of my calf. - - Yeah, when I find my shapely swell I'll letcha know!

I suppose if I were post-holing through a couple of feet of snow that might come in handy to keep them up where they belong, but having been there, done that, - you know, back when I was young, a northerner,  and didn't know better - I have no intentions of getting myself into that sort of situation again and find that, for me and my circumstances, the stiffness of the fabric is all that's needed to keep the gaiters standing tall and not bunched-up down around my boot-tops.


My biggest concern, robustness-wise, was the foot-straps that are down there getting ground between my boot and the trail with every step.


I'm not sure what those straps are made of but I estimate that I have put somewhere around 300 miles over sandy, rocky ground on them and see no signs of wear yet. No cuts or nicks, and if you brush the dirt off, not even any discernible scuffs.


The one area showing wear, other than the collected grunge which I don't bother washing off since it will just be right back again, is the metal snaps at the top and bottom of the Velcro strip. The snaps are there as one more assurance that the gaiters will stay closed and secure. These snaps are not the cheaper plastic variety but are made out of very tough metal. So tough it is often quite a struggle to get them to snap and even more difficult to get them to unsnap, although that might be in part because of a collection of grit gathered during my travels.

But of more concern is the fact that my apparently toxic leg-sweat seems to be eating away at the upper snaps rather quickly. To the point where the metal is being eaten away and has become prone to bending.

But while this looks bad, actually it's no big deal since the Velcro seems to be enough to keep the gaiters closed and in place anyway rendering the snaps an unnecessary closure-redundancy, so I eventually stopped struggling with them altogether. (If I was truly smart I would have stopped using them much sooner, but - well, what can I say?!)

With the understanding that I haven't yet, and don't intend ever, to use them in the deep snow they were originally designed for, and a one-star deduct for the corroding snaps, I would give these gaiters a 4 star rating - If this was Amazon and not a blog.

And it's nice to have my gorgeous legs back to their chick-magnet glory. And it's nice to look down and see legs that have recovered from their "Holy crap what happened to you!" state of scabbyness.


Monday, March 7, 2022

The Paul Bunyan Pucker-Factor They Don't Talk About!


You see that tree there in the middle?

The one that looks like it's falling down?

Well it is, but in very slow motion. Somewhere along the lines of 2 or 3 degrees per year for - well, to be honest I haven't been keeping track.

In fact I was doing a damn good job of ignoring this slow-motion disaster, right up until The Wife found a tiny little replacement-tree wan-a-be she took a shine to there at the yellow arrow and she made sure I realized that it was in danger of being squished.

I scrounged a few rounds of log left over from taking other trees down and built a little fort around it,  but even through my loyal veil of self-denial I could see that wasn't going to cut it, (Oh look! a pun!) and that death-tree was going to have to come down before it inadvertently squashed something important - or maybe even me.

On top of that, once I got to looking I found that there were three other trees, two at the red arrow and one more off to the right, that also looked suspiciously like thugs waiting with raised bats in the shadows of an alley ready to do damage at the first opportunity.


 In fact, the closer I looked the worse the situation got!

This is the up-hill side of that leaning tree and obviously things here are no longer on solid footings!


This is the tree off to the right of the first photo.

It looks like it could be just pushed over. (I tried and couldn't, but the wind can push a lot harder than me when given the opportunity.)


And here are the other two thug-trees.

Clearly not the most upstanding and stable citizens of this little community.

Anybody remember that late 70's movie The Warriors where a small group had to work their way across New York City by negotiating the territories of a whole bunch of different hostile gangs in order to get back to their home-ground?

All the sudden I kinda felt like that when out there in that little patch. (Ahhh for the good old days when ignorance is bliss!)

To remedy this situation I tried to locate the Blue Ox and her companion - but couldn't find them anywhere. Instead I had to hoist up my big-boy panties all by myself and deal with some serious pucker-factor as the implications of the job. - you know, thousands of pounds of ready to fall wood lurking over my tender head - started to affect the ability of my heart to beat properly.


In order to save The Wife's newly adopted seedling I really needed to make that big tree come down about 20 degrees to the west of where it clearly wanted to go.

So I got the snatch-strap out of The Van, wrapped it around the tree as high as I could safely get it,   (although safely is a relative term about now!) and anchored the other end off to the base of one of the other trees I was going to take down anyway (No worries about damaging a good tree that way)


with a come-along. Then set to work putting some snatch in the springy snatch-strap by cranking on the come-along configured with the turning block to the 8000 lb mode.

Note that that's the max capacity and the safe working capacity in this mode is 4000 lbs. I could tell by the degree of pucker in my nether-regions as I heaved my body-weight against the lever that I was exceeding that safe capacity one click at a time! But that was one hell of a lot of tree I was trying to coax into playing nice as it fell.


Now all that was left to do was tip-toe under that menacing behemoth and start cutting, very aware that the chain-saw chaps, leather gloves, and face-shielded hardhat were largely symbolic in the face of the many thousands of pounds of merciless wood looming overhead.

This face-cut I made might look a little shallow but it wasn't for guiding the fall of the tree, we all knew where the damn thing was going, I put it there to minimize rolling of the trunk as it fell.


But I've always had an iffy relationship with small engines, and about the time I got the face-cut to where I wanted it, my big chainsaw decided it had enough of me and picked up its toys and went home.

No amount of fresh fuel, adjustments, or pampering, not even the lure of free candy or the threat of the recycling bin, was enough to entice it to come out and play again.

So I was left with my small saw. 14 inches of guide-bar verses 28 inches of killer trunk!


It was a long and scary battle, and it wasn't pretty, but suddenly, in a flurry of sawdust being thrown off by an angry, snarling 2-stroke, the roots on the up-hill side of the tree started to lift and snap under my feet, sending me running halfway to the county line, (I'm proud to say there was no screaming but there might have been a series of "oh shit! oh shit"s - or words to that effect - as I ran) and she finally came down, resting nicely on that face-cut as she went thank you very much!

And if you look close there at the red arrow


blown up here in this image, you can see that the snatch-strap just barely managed to make her miss doing any damage to The Wife's pet seedling, though it was a near thing.


Like I said, it wasn't pretty


and yeah, I could have used a bigger saw!!


But I made do with what I had and with some careful cutting with the too-small saw from both sides and the help of my peavey I eventually managed to break her down into three tractor-loads of bigger stuff, one on the tractor, one there just below the car and another already carted off out into the woods to create habitats for critters, as well as a big pile of bits small enough to be run through the chipper.


This is what that pile of small stuff looked like after being fed through the chipper hanging off the back of the tractor. There's no scale of reference in this photo but the pile is about four feet high.

Once I had that tree all cleaned up and the ground clear of tripping hazards and safe to work on again I had to do it all over three more times!

Take a tree down, clean it up, and move on to the next.


But when that was finally done, and we're talking several days, days in which I could have skipped my usual morning workout without penalty but stupidly didn't, I was finally able to go back and trim the stumps off near ground-level to make mowing this area with the brush-hog much easier than when I had to dodge those four trees. (I always fall trees at about waist level, which keeps my on my feet so I can run away faster, then go back later to trim the stumps down.)

Now all I have to do is remember to dodge the little seedling there under the yellow arrow when I'm tractoring around.


But the job wasn't quite done yet!

Some think cedars are soft wood, but they aren't. Especially down around the base of the larger ones where the wood is remarkably dense, so dense it can be polished like steel. On top of that cedar is actually kind of gritty because it tends to incorporate the sandy loam it prefers to grow in. Both these traits take a toll on saw-blades.

For this reason I have three chains for each of my two saws that I can swap out as a chain gets dull, (starts creating more dust than chips) rather than having to stop in the middle of a project and sharpen. But since I was limited to the small saw for this job its chains took a lot of abuse and I'm that guy that insists a job isn't finished until all the equipment and tools are cleaned, tuned, and put away ready for next time.

Fortunately I don't have to hand-file every tooth on every chain. Instead I have this sharpener. It isn't automatic, I have to hand-position each tooth before hitting it with the grinding wheel, but it sure speeds up the process!

So, three chains, 51 teeth, sharpened and now I'm done.


Except that I really should do something about getting that 455, the big saw, running again.

Oh, and there's those three trees on the other side of the main barn that need to be taken down at some point, hopefully without hitting the well-house - - - but frankly, right now procrastination seems like a better idea.