Monday, January 31, 2022

Sometimes Even Boneheads Deserve a Little Serendipity


The other day I had strung out my 100' extension cord from the well-house, where there is a power-outlet, to the tractor barn, where there isn't. (It just barely reaches, and only if I sneak it in under the back wall of the barn and not around through the door.)

I needed power to run the grinder with a wire-wheel mounted on it to clean up a little spot - OK a big spot - of rust on the chipper before hitting it with some rattle-can rust-converter followed up with a shot of rattle-can sealer.

After I finished, as I was in the process of coiling up the extension-cord, I spotted something out there nestled in the weeds and under the downed oak-leaves that looked a little out of place

Can you see it there in the middle of the photo?


How 'bout now?


About four years ago, give or take a few months, I "misplaced" my claw-hammer.

OK, not so much misplaced as downright lost the dang thing. And being one of those 'core' tools everybody needs just to get along in this life, a dang thing I'd had for some thirty years or more!

Because I wasn't happy with myself for doing so, the losing part I mean, and because I have another claw-hammer in The Van's tool bag, as well as a smaller version in the collection of tools in The Wife's car, and an even tinier one (why I don't know!) in the kit down in the tractor-barn. I never made the effort to replace it.

But, because of that lack of effort, for four years now this empty slot in the shop's tool-cabinet has jeered at me.

Every time I glance over there I can hear the faint, sing-song sounds of a school-yard taunt. (Ha Ha! Look what you did!)


But that ends today!!

Because out here in an obscure corner of the property where I rarely walk, and have never actually worked on anything at all, let alone something requiring the application of a hammer, that missing tool was serendipitously laying at my feet.


And after being buried under four seasons of discarded oak-leaves, deluged by 171.67 inches of rain - plus or minus a few tenths -, surviving 3 ice storms, one actual snowfall, and a half-dozen or so passes of the brush-hog's whirling steel blades, it was looking pretty damn good!

Far better than I would have expected.


In fact, all I had to do was wire-brush off a little stubborn clay - I imagine I must have run over it with a tractor-tire and smushed it into the ground at least once during that time - and it was


ready to be finally returned to its rightful place.

The only think I can figure is that four years ago I did something to the tractor up at the main barn that required the services of a hammer and then just left the tool laying there somewhere on the tractor as I drove down to drop the brush-hog, (The only time I drive this bit of ground behind the tractor-barn is when I'm either shredding it or on my way to drop the brush-hog off where it lives beside the barn.) which was a pretty bone-headed stunt in anybody's book!


Now that serendipity seems to be in my court maybe I'll be able to find that power-washer tip I shot out into the field when I failed to seat it properly in the wand before pulling the trigger! 


Monday, January 24, 2022

Surviving the Night - My Sleep-System

OK, "surviving the night" might be laying it on a little thick.

This is not about emergency sleeping arrangements if caught out unexpectedly, something I've already touched briefly on in past posts. This is about my 'normal' sleep system for everyday use.

And why do I keep talking about "my sleep-system"?

Why get so fancy about it? Why not just call it a sleeping bag?

Because, despite the amount of thought and time we put into choosing one, a sleeping bag alone is only one component of a proper sleep-system.

But I'll start with the sleeping bag anyway.


When I was growing up (Actually I'm pretty sure I'm still growing up! But you know what I mean.) you were pretty much on you own when it came to picking the proper sleeping bag for the conditions. There were no standards and each manufacture could say whatever they wanted about their products with no Yelp or Amazon reviews to dispute them.

Obviously this was not ideal - at all - but even so, it wasn't until 2005 that the EN, covering 24 European countries and New Zealand, established a sleeping bag standard and it took even longer, until 2017, before international standards (ISO) were established, giving the rest of us global consumers a fighting chance at getting it right.

But only if we understand the standard.

The color choices and wrinkles don't make it easy to read, but this particular sleeping bag's  official, verified ISO standard's comfort range is 35F to 40F.

Generally speaking men sleep about 5 degrees hotter than women so in this case a man might find this bag comfortable - which is defined in the standards as in a 'relaxed posture' and 'not feeling cold' - at temps down to 35F while a woman might find 40F to be the limit.

But to complicate things, we are all different. For instance, contrary to gender rules I sleep significantly colder than The Wife - which explains why I'm huddled under two blankets during air-conditioner season while she has kicked her sheet off and is sweating.

In reality, when using the bag in the photo above, at 45F I can feel coolness where it is resting close against me, for instance on the tops of my thighs when laying on my back. And at 40F I'm ready to look for a little more protection.


Unfortunately, even beyond our personal micro-climatic differences, our gullibility has a tendency to lead us down brick roads that often turn out to lean more towards shit-brown than golden-yellow.

It's human nature, and marketers know all about human nature, that when we see advertising that claims a battery will last "Up To X hours", we ignore the manufacture's legally indemnifying "Up To" and focus only on the "X hours", at the same time also managing to completely ignore the implied "under best conditions that you will rarely see" clause. And in the case of sleeping bags, when we see "Rated Down To" that's what we tend to fixate on.

But the IOS standards actually define three separate ranges for sleeping bags, one of which is not comfortable and another of which is downright miserable. So, against all our inclinations, conscious and subconscious, we should be looking at the highest range, the comfort range, and completely ignoring the rest.


Some manufactures, such as Winner Outfitters, the bag in the first two photos, try to protect us from ourselves (OK, in reality they are probably more interested in protecting their credibility and corporate reputation but it all comes down to the same thing.) and splash only the comfort range, in this case both the "typical male" and "typical female" ranges, in large print, while others, such as those that built one of my other sleeping bags, not only print out the whole shebang, but in this case the marketing department has actually bent the standard it in such a way that implies more performance than is really there.

In this case that middle, so-called "Male Comfort" range actually corresponds more closely to the ISO's "Transitional" range, which is defined as "curled up, fighting the cold but not yet shivering". (Extreme is basically defined as "You're going to be damn cold, might suffer some frostbite, but probably - maybe - won't die.")

So knowing this, and myself, when evaluating a sleeping-bag I look at the highest number in the highest range of the ISO results and ignore the rest.


But I'm not out of the woods yet. (Not sure if that pun was intended or not - - -)

To achieve those certified performance levels I still need to understand how those numbers were derived, and if I don't - well I'm kinda screwed!.

Whenever I see a reviewer complaining about the way the inner lining of a sleeping-bag feels against their skin I know they're doing it wrong! That's not how a sleeping-bag is designed to work.

ISO ranking of a sleeping-bag is actually a rather involved process that uses self-heating manikins that simulate a human's internal heat generating properties, the same manikins they use for testing a variety of survival gear. The surface of these manikins is then plastered all over with thermal sensors and and the manikin stuffed into the sleeping bag under evaluation. More thermal sensors are mounted on the bag's outside. Then the whole shebang is loaded into a carefully controlled cold-chamber for several hours of observation and data-logging.

That seems pretty straightforward but what I might have missed if I wasn't looking for it, is that, per the testing protocol, (Fortunately for us both ISO and EN use pretty-much the same standards and testing protocols) these manikins are first dressed in a typical base layer and then the manikin-stuffed-sleeping-bag is placed on a basic foam pad before the door to the cold room is closed.

If I neglect either of these details my experience will definitely not be on par with the claims.

Even if you normally sleep naked, if you think about it, wearing a base layer inside your sleeping bag not only matches the standards and allows the system to perform to expectations, but it makes a lot of sense.

It's a lot easier to wash your night-grunge off a load of base-layer than off a sleeping bag. Even if your sleeping bag is technically machine washable it will last longer and keep performing better if you keep it out of the clutches of that agitator!

To ensure I have a reasonably fresh and dry base-layer to sleep in I have a set dedicated for night-use.

Now base-layers, styles and materials, is a post of its own so I'm going to pretty much gloss over the complex subject here except to say, for budget reasons, and because I don't live in a northern climate where I can get a great deal of use out of them, I use a run of the mill, off the shelf, thermal top and bottoms. Usually polyester with maybe a touch of spandex or rayon and never ever any cotton since its cold-weather performance is suspect at best and life-threatening at worst!

Oh, and I do insist on proper wool socks. (I feel a tirade on the properties of wool verses cotton coming on, but I'll try to restrain myself here. Although - - maybe that's a topic for yet another post?)

When it comes to sizing base-layers, despite the science of close-contact and wicking; which is what a base-layer is really all about and not the "insulation factor" marketers have tried to pound into our brains; because of my dislike of wearing tight clothes I set aside any residual vanity time, age, and that cruel mirror hasn't already beaten out of me and buy XL or even XXL if available. 

And speaking of circulation being cut off by too-tight base-layers, (OK, so maybe I wasn't actually speaking about that but I think it was implied!) the need to maintain full circulation is especially true for socks! Like hands, feet don't actually generate any significant heat of their own, instead they rely on either the circulation of warm blood or thermal conductance through direct contact with another heat-source. And unlike my hands, I can no longer tuck my feet into my armpits for that thermal conductance when they get cold! So tight, blood-flow constricting socks, whether around the foot itself or around the ankle are not a good choice. (Let's hear it for old-fashioned knit rag-wool socks!) 

For simplicity I keep this dedicated set of base-layer tucked right inside the sleeping-bag all the time.


Remember a few paragraphs ago when I mentioned that the testing of sleeping-bags is done on top of a foam pad?

Well that's not for the comfort of the manikins, though I'm sure it doesn't hurt. They do that because this pad, or something similar is critical to a proper sleep-system.

Again, staying warm is all about insulation, and insulation is all about trapped air.

Well I'm not a weightless cartoon-princess, and when I lay down on my sleeping-bag I crush most of the air out from the part of the bag underneath me, so now I need to replace that critical insulation with something that won't allow the air to squeeze out so easy.

It's kind of a side bonus that such a 'something' can also be used to cushion my delicate body from the hard ground!

There are a number of options here, and I've tried several of them. This is the multi-part sleeping-pad system I've currently settled on. 


It starts with this Sleepingo air-mattress which is advertised to be 2" thick when inflated. In reality I think it's slightly less than that at 'normal' inflation pressures, but not enough to quibble about.

It works reasonably well, both as insulation and as padding, and takes less than two minutes to inflate by mouth.

OK, technically I'm not supposed to inflate things like this by mouth because it introduces moisture into the interior which, over time, could promote the growth of nasties, but who carries an air-pump around in their backpack??! Besides, the nasties are, presumably, trapped inside and can only get out when I deflate the thing.

To keep the nasties from becoming too much of an issue I just lay the partially inflated mattress out on some black plastic on a sunny day. I figure this helps cook them into dead nasties.


Deflating and packing the air-mattress is pretty easy.

I stick my finger into the large inflation-valve and pull the little one-way flapper thingy part-way out, at which point most the air inside rushes out in a sigh. (So if you hadn't brushed your teeth before inflating the night before - turn your head away!)


Then I fold the mattress into thirds lengthwise, lay it out flat with the still-open valve on the bottom,


and start rolling from the other end, herding any remaining air out the valve.

Once I have it rolled up I close the valve, both so that that little one-way flapper thingy doesn't get a permanent kink in it and stop working, and so that the valve assembly lays flat as I slide the mattress into the carry-sack.


OK, you may have noticed in the previous photos that there is yet another component to my sleeping-pad setup.

The thing about air-mattresses, including those fancy open-cell-foam-filled self-inflating jobs, (I have one of those too but it packs so large I've never carried it on a backpacking trip, though it does make a useful folding-chair-insulating pad on chilly evenings.) is that if they spring a leak they are useless, both as insulation and comfort. And I don't kid myself, at some point as I'm messing around in camp and flopping myself down to sleep on a variety of terrains, a bit of pokey debris is going to ride in on my butt or jab up right through the tent-floor, and a leak will  ensue!

Yes, leaks can be patched, and you've seen from a previous post that I do carry a bit of patch-material with me. But, have you ever tried to locate a pinhole leak on a freezing cold night in the dark confines of a one-man tent - then find your patch material - then have to locate the leak all over again because you lost track of it while digging through your pack for said patch material?? Oh! And while all this is going on that pokey bit that caused the leak in the first place has gone on a Norman Bates stabbing spree, complete with screechy, staccato, stabby music, so you're screwed anyway!

My solution is to have something that can't spring a leak between air-mattress and ground or tent-floor. Something like this 7/16 inch thick closed-cell foam pad.

By placing this pad down first and the air-mattress on top of it I accomplish several things.

  • The foam provides additional protection from pokey things under the tent
  • It adds additional comfort because now instead of my hip and shoulder bones bottoming out on the hard, cold ground when I turn onto my side, the pad, which is really difficult to compress all that way to flat, provides some cushion for these pressure-points.
  • The closed-cell foam pretty much doubles the insulation value of my sleeping pad system.
  • And if I do suffer a puncture (Well - I mean the air-mattress. If I suffer a puncture I bleed - - -) the pad is there to offer me additional support and some insulation while I ride out the failure.


The downside to this type of closed-cell foam pad is that it doesn't like to lay out flat without weight on top of it, won't behave when rolled without an additional strap to keep things under control, and packs kinda big.

But because it is so light I don't notice the bulk when carrying it in the straps designed for those new-fangled accordion- fold waffle-style pads.


Speaking of which, since they offer all the same protective and insulation properties as my roll-up pad with the promise of even more comfort, and pack up easier (I have to wrestle my pad into a pretty tight roll so it fits within the limits of the straps on the pack.) maybe one of these days I'll get one of them and try it out.

But for now, moving on to the last item in my sleep-system, which is purely about comfort.


My pillow.

OK, I know this seems like an indulgence. After all, a jacket crammed into a stuff sack, a wadded up pack, even some shirt-wrapped boots, can, and all have been, used as a pillow and have the advantage of being carried along with me anyway.


But the snowflake truth is that my pillow is more comfortable than all those alternatives. And it really doesn't take up that much room.

In fact I have two of these pillows and use one in The Van as well, having ditched that big bulky, traditional pillow. (actually, for the past several years that big bulky traditional pillow has been taking up valuable space in one of the cupboards in our living quarters because it hasn't worn out so I can't bring myself to throw it away just yet.)


The bottom-side of this inflatable pillow is covered with tiny little rubber-like nubbins which keeps the diminutive yet perfectly adequate pillow firmly in place for my beauty slumber. (Not the pillow's fault the beauty part doesn't work!)

For technical issues having to do with thermal conductivity that I've decided not to bore you with right now, in cool to cold weather this pillow should not be used with your head directly on it but always with the sleeping bag between head and pillow. 

For stay-in-place redundancy this pillow also has an elastic strap on the back-side designed to be looped over the sleeping pad. I don't use it for that but do use it for keeping tabs on the tiny little stuff-sack overnight. It's amazing how well those little suckers can hide!


On thing I absolutely do not want to do to my sleeping bag(s), even though it makes for a neat and compact solution, is store them in their stuff-sack.

As pointed out earlier, staying warm is all about trapped air, and trapped air is all about loft. By confining a sleeping bag to its stuff-sack for extended periods of time I am slowly ruining that loft as the fluffy material inside my sleeping bag, synthetic or natural, that provides its loft becomes permanently less fluffy.

Draping the bag over a hanger is better than leaving it in the stuff-sack but there will be a line of crushage where it folds over the hanger.

Some sleeping-bags come with loops on one end or the other that they can be suspended from by a hanger in a tall closet, assuming you have one, which is a pretty good solution.

But I have the ideal solution for bag-storage. Since I ditched traditional bedding in The Van years ago in favor of sleeping bags, all I have to do is leave my sleeping-bags laid out where I use them on my bed. This way the stuffing stays nice and fluffy and evenly distributed. And the bag is right there ready to use every night.

Because my bed is wider than I need for sleeping, I can keep both my mummy-bag as well as my light-weight rectangular summer-bag on the bed together. There's plenty of room for the one I'm not using to be pushed out of the way against the wall.

Which is handy since, if in the middle of the night things get a little too cool for my mummy-bag all I have to do is pull the summer-bag over the top like a blanket.


Which leads me, perhaps a little inelegantly as a segue, but leads me non-the-less, to the rectangular bag verses mummy bag question.

My first few sleeping-bags were rectangular. Maybe because there just weren't any affordable mummy-bags when I was a kid. These are familiar, an old standard if you will, but they have their failings and my hands-down favorite for cool to cold weather sleeping is the true mummy-bag. (Not those short versions that, rather than using a full 'hood', close up around your neck in a misguided effort to save a few ounces of weight!)

Not only is there less of it to pack, carry, and warm up from the inside with nothing but my body heat, but there's nothing quite like the feeling of sliding feet-first into a mummy-bag after stripping down in an icy tent or cold van to change into my nighttime base layer, and feeling the instant warmth envelop me when I snug my head into the hood. (We lose a significant amount of heat from our heads so I keep it covered!)

On especially cold nights I've been known to tighten the cords until the hood comes down over my eyes and the bag is snugged up to my bottom lip. But I never cover my mouth and nose because breathing all that moist air into my bag will quickly turn it into a soggy, clammy refrigerator!

(Don't get excited ladies, or gentlemen -  not really me!)

If it's so cold that my nose is a problem it's time to pack up and head closer to the equator!

But if that isn't practical I have one of these which is designed to be pulled up over the nose and breathed through, though I mainly use it to keep my neck protected from icy - OK, and even somewhat cool - winds during the day.


Some mummy-bags are advertised as having extra girth so there's room to roll around inside like a cue-ball in the bottom of a bowling ball bag. Frankly I don't get it. Mummy-bags should be worn like an outer layer of pajamas, not flopped around inside like you were under silk sheets on a king-bed in an overheated penthouse suite at The Ritz! All that extra sleeping bag just means that every time I shift position inside its luxurious roomyness my body heat has to warm up new territory all over again.

Besides, if I roll anywhere I need the hood-part of the bag to roll with me, and that's easier if the whole bag just rolls with me.

Where mummy-bags don't shine is hot-weather sleeping. Most mummy bags have side-zippers that only open up the top half to two-thirds of the bag so aren't especially good at ventilation, leaving the legs and feet cocooned in a sweat-box . This leaves the choice of either self-basting inside the bag or just laying on top of it. Which is fine for a night or two of back-country tent camping but, as you've already seen, I have a traditional, light-weight - and really inexpensive I might add - rectangular bag as well.

Being flannel with cheap, bulky stuffing, it doesn't squish down well at all so it isn't a good backpacking bag, but since it can be opened up completely and tossed off as much as necessary it makes a comfortable alternative for warm to hot nights in The Van, and I already alluded to how I also use it as a blanket over my mummy bag on especially cold nights.

OK, So that's about it.

The only thing I haven't covered is packing the sleep-system for a backpacking trip, but that's another post. 

Oh - and someday, if I get really careless with the wallet I might indulge in the holy-grail of a real down bag that will pack ridiculousness small, yet still keep me warm down to oh-crap-it's-cold! But for now what I have seems to be working just fine for me. 


Monday, January 17, 2022

One of Life's Trueisms


You can't pee in the shower in January with a broken water heater!


(everything is just too clenched up)


Ahh, we do love our conveniences.

And for most of us hot showers have long since morphed from a luxury to a "necessity", a God-given right, that we don't even think about anymore - until they aren't - - hot that is.

Our hot-water needs, The Wife and I, are modest. In addition to the shower (NO BATHTUB! What a resource-wasting, disgustingly unhygienic, and inherently unsafe way of trying to get clean!) our hot-water usage is limited to a vanity-sink, kitchen-sink, and washing machine, and since there's just the two of us rarely are any two of these going at the same time for more than a handful of seconds. So this relatively small 18kW tankless water-heater mounted out in the barn just above the washing machine serves us just fine. (We don't have a propane system in the barn so use electricity for water heating.)

Well - I should say it served us just fine right up until the other day. A day when some adrenaline-producing, flight-response triggering, high-pitched shrieks blasted out of the shower at ear-splitting decibels followed by a series of hoots that would make any chimpanzee mother proud! (I won't tell you which of us was the source of this embarrassing racket!)


It - the water heater- is a relatively simple device.

Cold water enters through a flow sensor at A, goes past a temperature sensor at B, which works in conjunction with the outlet temperature sensor at C to modulate the heating elements to get the water up to the temperature called for by the setting dialed in on control box D, before it heads to the various faucets - in our case none of which is more than 20 pipe-feet from the heater.

In between the two temperature sensors the water flows down tube E past one heating element and up tube F past a second.

Of course the heating element is off unless there is water-flow - until it's burned out that is. Then it's off even when there is water-flow!

A significant shortcoming of this unit, in my opinion anyway, is that, rather than modulate the power to the two elements evenly, it's not until the control-box has cranked up the first element, element E, to its max before it starts to add additional power, if necessary, to element F. Don't get me wrong, for producing the desired water temp this works fine, but it does mean that element E gets used a whole lot more than element F, and this uneven distribution of load

can result in element E, the one on the top in this photo, burning out before it really needs to. (We installed this water-heater in early January of 2012 so it took almost exactly 10 years for this to happen.) while element F still has a lot of life left in it. This unevenness of use is especially evident with our very hard water which produces a copious amount of scale when heated. I already knocked most the scale off element E before taking this photo, but the lower half of the element was completely packed with scale, to the point where I had a tough time getting the element out of the tube.

Oh, and I hadn't done anything at all to clean up element F, the one on the bottom, of this photo. This is the way it came out after 10 years of use.

By the way, however it handles power to the various elements, I do not recommend tankless water-heaters that only have a single temperature sensor on incoming water and rely strictly on that, the detected flow-rate, and an algorithm to produce the proper output temperature. We originally had one of these and it never was predictable enough to trust. (It only lasted 7 years and I wasn't particularly devastated when it got bad enough to replace.)


Since nobody, even in the city, had a replacement unit on the shelf we had to wait a few days for one to be delivered to our local hardware store, which is 30 miles away.

In the meantime, since the control box obviously isn't capable of detecting a failed element and compensating for it, we limped by on tepid water by cranking the temperature control on the failed water heater up to max which fooled the box into sending more power to the one working element.


But even in our mild climate, tepid in January is none too comfortable, so as soon as we had the new unit in hand the replacement process was under way.

After turning off the two 40 Amp breakers that feed this thing and knowing there was no power to the box, I double-checked with a meter anyway - because 240 Volts - twice - is nothing to screw around with,

and a couple of minutes later had the plumbing and wiring disconnected and the old unit removed.


Doing this with a minimum of disruption to the rest of the plumbing was facilitated by having shutoffs on both the cold water side (the upper valve) and hot water side of the heater. (It's not a hot water heater! If the water was already hot no heater would be needed. The only hot water heater in most of our homes is the element in the bottom of the dishwasher which is used to heat hot water up even hotter.)

Even to this day many local building codes still only require a shutoff on the cold side of the water heater. This may have been fine back in the days of two-handled faucets, but today's single-handled faucets with their shared-valves turned to somewhere between cold and hot can feed cold water back the wrong way down the hot water side if there is no shutoff on the hot water leg.

(That big canister there in the middle of this photo is the filter on the washing machine's drain. We have a septic system and feeding all those inorganic fibers from clothing, or even the somewhat organic hairs from The Wife's rescue cat's rugs, through that system is not a great idea. Instead we just periodically pull the filter-bag out of this canister and dump the contents into the trash.)


Because it was an exact replacement, a few minutes after the old unit was out the new one was in, hooked up, the breakers were closed, voltages were check, and it was operating.


Once the cover was on and things put back into place it was like that whole horrible event never happened!

So what about the old water heater?

Well it has since been carefully de-scaled and a new element installed - for about 10% the cost of a whole unit.

Why, if so cheap, did we replace the whole unit and not just the element in the first place? For one thing, we couldn't be sure the extent of the damage without opening it up, and we couldn't do that without removing it, and at the time even a partially working water heater was better than nothing. But the main reason is that I'm a bit anal about these things and it has long been a worry of mine that we didn't have a standby unit already here and ready to go.

Now I won't have to worry about that anymore. The old unit has been boxed up into the packaging the new one arrived in and put on the shelf to gather dust and provide peace-of-mind.

Assuming the new unit runs failure free for the same 10 years as the old one that works out to less than $40 a year for some peace-of-mind, and when you sum up the annual cost of auto, homeowner, and medical insurance we pay for, that $40 works out to be a very small part of what our other piece-of-mind costs are.

Yes, it is an extravagance, almost to the point of being embarrassing, but I worked my guts out, 60 hours a week, for several decades and in doing so have been blessed with the means to afford such treats, and I'm slowly learning to take advantage of that.

In the meantime, boy is it great to be able to pee in the shower again!!!


Monday, January 10, 2022

How To Stay Alive While Day-Hiking

 OK. Maybe that was a little mean - slapping up a rather sensationalist title like that - but on the other hand - - -

What this post is really about is what I carry with me on day-hikes, and to make the title somewhat relevant, much of what I carry is all about making sure I make it back again if something goes wrong along the way.

And yes, I already wrote a post on this same subject back in the spring of 2014, but, despite being old and set in my ways, I continue to learn and evolve and have made some changes - hopefully upgrades - to my day-hiking toolkit since then.

I'll tell you up front that to many this list is going to seem a little excessive, possibly obsessive, and I'll admit that I tend towards overkill, but it seems like the more I prepare for unexpected eventualities the less they actually happen and that is certainly fine by me!

I don't know how it works, maybe karma, maybe something else, but I'd rather spend 5 minutes every single month (132 of them so far) crawling under The Van to check the air-pressure in the spare tire that I have never had to use, (so far) than end up stranded just once on the side of a dark and wet highway with a flat tire and flat spare because I couldn't be bothered to check on it..

Creek Stewart is a wilderness survival expert and on many editions of his various survival shows (on the Weather Channel) he introduces people as 'experienced' hikers. Well apparently experienced and smart are sometimes two different things and a common theme for those experienced hikers that end up on this show is that they started down the trail with what I consider not nearly enough gear.

To be fair: Time and time again I see people setting out on the trail clearly under-equipped. Time and time again I shake my head (in an admittedly supercilious way) at their folly, imagining all sorts of trouble they might get themselves into. And time and time again the majority make it back on their own just fine - but not all of them.

When I set out on a hike, or any other activity that I freely choose to pursue, I believe it's my moral obligation, my responsibility, to do my best to prepare for dealing with the risks and unexpected events that may bite me in the ass, and because of that preparedness, eventually be able to self-rescue.

And honestly, I don't think it takes that much to be safe and reasonably self-sufficient, on the trail or anywhere else.

So, with that rather long pre-amble, I think it's time to finally get started on the list of equipment that I day-hike with.

(Man, I thought that guy would never stop talking!)


I'll start with what I carry in my pockets, which, other than the usual ID, key to The Van, and a pen  in case I need to leave notes, isn't much, but it is critical to safe hiking.

In one thigh pocket (Why would anyone wear anything other than cargo pants?) I carry a paper map(s) of the area. 

In the other thigh pocket I carry my phone, fully charged, no apps running, and in airplane mode since most places I hike have no cell service anyway and searching for service really sucks the juice out of a battery. (A few weeks ago I was doing some impromptu hiking in Michigan. I'm not used to hiking with a cell signal and what with local family calling and texting I eventually turned airplane mode on just to shut the dang thing up. Ring-tones just don't belong out in the woods!)

This phone is the backup for both my GPS, which of course has a map of its own on it, and my paper maps.

If my GPS packs it in during the hike I can switch over to using the Guia app on my phone for both a map and to track my location. (Since the location service operates off satellites, even when there's no cell service the phone's location service still works.) The Guia app also has a remarkably accurate and responsive compass built into it to back up the more traditional lensatic compass that I also carry.


I also have a folder on my phone full of PDF maps I've collected, and add to during the planning of a trip. That way if my paper map(s) blows away in the wind I still have access to the maps I need for safe hiking.

And in case you were wondering, Yep, I'm big on redundancy!

Oh - and at any given time I also have anywhere from 10 to 20 books downloaded into my phone's Kindle app as well for off-line trail-side reference (area and/or trail guides) or entertainment.


The final 'pocket items' I carry are these.

When closed up the black thing is about the size of a partially-smoked cigar. (Partially-smoked cigar?! OK, so I might have watched one too many Columbo reruns lately - - -) 

The piece in the middle is a length of ferro-rod with handle, the other big piece to the upper left is a ferro-rod striker with handle, attached to the lanyard there at the top-right, is a tiny whistle, much more effective for emergency signalling that the voice, and tucked into the cap that goes into the end of the fero-rod handle is a petroleum-jelly soaked cotton-ball which makes an easy to light and long burning fire-starter.

And of course there's my knife. Yep, that tiny little thing there next to the quarter (I don't carry the quarter, it's just there in the photo for size comparison!) is my version of a he-man ax. It weighs all of an ounce, is 100% stainless steel, and has a 2" blade which I keep nice and sharp on a strop. This little knife does very well at its primary job of cutting cordage, and with some poles and a little bit of cordage just about anything needed around a camp can be built - other than maybe a rescue helicopter or a juicy hamburger. It also does a great job of making feather-sticks, putting points on wooden stakes and striping bark off food-skewers. So laugh all you want. It works for me.

I keep these last two items tucked into the bottom of my pant's 'map-pocket', which has a flap to make sure nothing falls out as I tumble down a cliff. They are my a last resort option just in case I get separated from my pack. Which, by the way, is a big No-No! A cardinal, if not mortal, hiking sin! But, as I've been told once in a while - OK, maybe more than once in a while - I'm no angel, so it could happen - - -


But moving on from my pockets:

I've sometimes heard slightly different numbers being used, but as a young scout I was taught the mantra of three's. It goes like this, you can survive; three hours without shelter, three days without water, and three weeks without food.

OK, first off, that is survival times, so you should cut those numbers in half if you're thinking in terms of being able to function and not just lay there and breath your last. And functionality could be kinda handy if you're going to self-rescue.

And secondly, the actual numbers will vary depending on circumstances and climatic conditions.

But the point is, survival priorities should be ranked in the order of shelter, water, and then food.

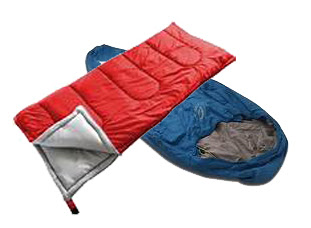
It's not often thought of this way, but shelter starts with clothing. And for proper protection from pokey things, weather, and that nasty UV, I always hike in light-colored, loose-fitting, long pants, long-sleeved shirts, and a wide-brimmed hat, even on the hottest of hikes. (You never see Bedouins wandering around bare-headed under the desert sun in wife-beaters and cutoffs!)  I also carry an extra layer of clothing with me, the details of which depend on the season, For instance in summer it may be just an extra shirt I can throw on over top of what I'm already wearing if I'm caught out when the sun goes down, while in colder weather it might be more of a complete extra layer.

In addition to clothing there are an amazing variety of actual shelters that can be made with the few tools I carry in my pack and/or the natural resources laying around wherever I am. It just takes a little bit of pre-planning to ensure I have the know-how and means to build one.

Many packs have a tall side-pocket for tent-poles, including my Kestrel. And that's what I use that pocket for. But even when I'm not carrying a tent and its poles I keep a bag containing a few tent-stakes, several lengths of para-cord, and about a half-dozen pre-made para-cord loops in the bottom of that pocket. I also keep a full 50 foot skein of para-cord and a pocket chain-saw in this compartment as well.

I already went over how most of this stuff can be used for making an emergency shelter in this post, but I haven't talked about the saw before - at least not that I remember.

Thoughts of wilderness conjure up grizzled he-man images of an ax-wielding woodsman, or at least one with a great-honking-knife. Well I never have carried an ax when hiking and I used to, but no longer, carry that great-honking-knife either. (though never one even half as big as that!)

With a little bit of cordage, poles cut from the trees around me can be transformed into all sorts of shelters and 'camp furniture'.

But you know what's really inefficient at cutting poles? Axes and great-honking-knives! So I carry that pocket chain-saw instead because it is superbly efficient at cutting anything from a 10' long ridge-pole for building a shelter to a 12" long bit of dry wood for my fire. (I can make 6 cuts with the saw in the time it take to cut through once with a large knife and be a whole lot safer in the process!) And it produces a coarse sawdust which makes a great addition to the tinder-bundle! Though green wood is actually easier to cut than dead, so save the dead stuff, and its saw-dust, for the fire and look to green stuff to build - well , stuff with.

As I work my way around my pack I'll come across a few more things that could be considered shelter-building tools, for instance fire is an important component of many good shelters and I have several ways to start one of those, but for now, sticking with the priorities of the survival triad, I'm going to switch from shelter to water.

My primary source of water when hiking is from a bladder.

Some prefer water-bottles but I find I stay hydrated better when all I have to do is put the bite-valve in my mouth and sip rather than stop, contort my body in order to reach back and blindly feel around for the bottle with my fingertips, yank it from the side-pouch, gulp half of it down to make up for waiting too long to drink, then end up having to take my pack off anyway to wrestle the bottle back into the side pouch.

But the down side of using water bladders is that they are hidden away so have a tendency to run dry without warning.

To get around this I carry two bladders, only one of which is shown here. One is hooked to my drinking tube and the other is on standby in my pack. If and when the primary runs dry I switch it out for the other and immediately start calculating the shortest route to a spigot.

But having a spare bladder only gives me one layer of redundancy and as we've already seen back there with my maps, I like extra redundancy, especially for critical things like water. Therefor I also carry a Sawyer purifier kit.


The kit I have includes two collapsible water containers that screw into the input side of the purifier, (Having two of these 30 oz bags reduces the number of trips I have to make down to the water-source, which we all know we shouldn't be camping any closer to than two or three hundred feet so we don't disturb the animals who's home this is and who rely on that water-source daily.) the purifier cartridge, and a mesh bag to put it all into.

This is a nice compact system but has a couple of shortcomings so I have also added an Evernew 30 oz collapsible bottle , a couple of adapter rings, and a recycled 16 oz plastic water bottle.

The Evernew is for collecting the clean water from the purifier and the adapter rings are for connecting the Evernew directly to the purifier cartridge. True, I only need one of those adapters but they are inexpensive so I have an extra just in case, because they are also tiny and easy to misplace.

As for the small plastic water bottle; the blue collapsible containers that come with the Sawyer fill just fine from a tap, hose, or modest waterfall, but are nearly impossible to fill from a stream, pond, or puddle so that's what this water bottle is for.

I carry it crushed down nice and compact to fit into the mesh bag with everything else and when I blow it back into shape it's ready to be dipped into a puddle and collect water that I then pour into the larger collapsible containers.

At this point the purifier can be screwed onto one of the full dirty-water containers, the smart-bottle cap on the output side of the purifier opened, and the dirty-water container squeezed while you drink straight from the purifier.

But I prefer to remove the smart-bottle cap from the purifier, install one of the blue adapter rings and then screw the Evernew to the other end of the adapter. Using the mesh carry-bag, I suspend the system from any handy point and let gravity run water through the purifier into the Evernew, which will unfurl itself under the weight of the incoming water, while I'm off doing something else.

Normally this is all tucked into the mesh bag and lives, pretty much ignored, in one of the side water-bottle pockets on my pack.

I just have to remember to either blow residual water out of the purifier or keep it tucked into my shirt during cold weather because if the costly purifier cartridge freezes with water in it it's toast.

And if that's not enough redundancy for you I also know how to string up my poncho to collect rainwater or build a solar still out of a hole in the ground, a cup, a plastic bag, and a large pebble, so I think I'm doing about as well as I reasonably can at covering the very important water issue.

So moving on:


The easily accessible hip-belt pockets of my pack are loaded with a variety of very useful stuff. Some of it just makes the hike more enjoyable, some is critical survival gear, a lot of it is a little bit of both.

Starting at the GPS - which technically rides on my shoulder strap and not the hip-belt - and spiraling around counter-clockwise:

Two extra sets of batteries for the GPS and one extra battery for the camera - I always start out with fresh batteries in the GPS but the camera battery lasts so long I don't replace it with fresh for every hike, I just let the one in it run out then switch to the spare.

The camera

Two repurposed squeezable plastic craft-paint containers. One is filled with my favorite sun-block and the other with hand-sanitizer - which can also be used as an accelerant to help get the fire started

One small spritzer bottle - the blue one - loaded with bug-repellent

One lensatic compass

A small headlamp with one spare set of batteries

A small lighter with the kid-guard removed (Just takes a little prying with a small screwdriver) so if it runs out of gas I can still drop a lot of sparks into my tinder-bundle by spinning the wheel against something like the surface of a flat rock or a bit of bark. (When I was young and dumb - OK, dummer - I tried using just my palm but that hurts!)

Two water-proof containers, one loaded with a mix of kitchen and windproof matches along with the necessary strikers, (Because all matches sold in this country are now safety matches, gone are the manly days of flicking a match to life with your thumbnail) and the other loaded with cotton-balls dredged through petroleum jelly which, when teased out fluffy again make a fantastic tinder that burns long enough to get a fire started even in the damp.

And finally, a backup knife identical to the one in my pants-pocket just in case. It's light and so small it sometimes gets lost in the bottom of the pocket so why not?


Flipping my pack over, tucked into the external front pocket (you'd think this is the back of the pack but somewhere along the way pack nomenclature got turned over and the back is the front, the front is the back, the left is the ri - - - well, you get the idea.) is my poncho and inflatable seat cushion.

I've talked about both of these before so that's enough for here.


With the exception of extra clothes, which go into the main compartment, everything else I carry for day-hiking is up there in that compartment at the top of the pack, the brain as it's sometimes called.


If I unhook the brain and look underneath it (finally top is top and bottom is bottom!) there's a mesh compartment under there.


Here I keep a sort of random collection of things.

I have the ExoSpikes I can pull on over my hiking-boots like those old-fashioned goulashes when things get slippery up on a cliff or down in a creek-bottom.

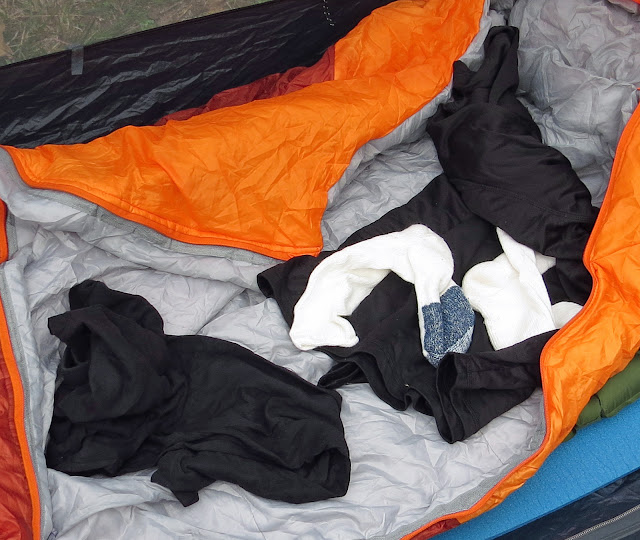
The yellow microfiber towel that I can wash dishes and my face with then turn around and wring out nearly dry so I can use it as a towel to dry my feet after wading through that creek.

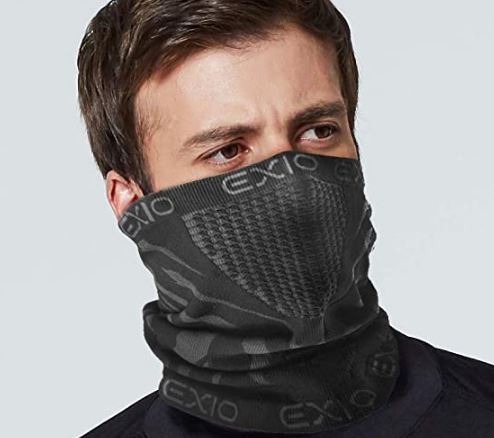
The mesh bug-net that I can pull on over my hat and close up down around my neck to keep from breathing and swallowing bugs when they get bad. (Remember, I have long sleeves and long pants to protect most the rest of me.) By The Way! This also works great for carrying found fire-starter material, such as a downed bird's nest, that must breath if it is going to remain usable. (This is one thing zip-locks are terrible for!) Put your fire-starter, or even wet socks inside, use the draw-string to attach to the outside of your pack, and go.

The hunter's-orange bandanna that can be waved around as a signal, or when draped over the top of my hat and tucked into the hat-band keeps me from getting shot, strung up and gutted by clueless hunters.

And finally something that is fairly new to my pack. This is a bag containing about 150 feet of hunter's-orange surveyor's tape that weights a couple ounces and compresses down nearly flat. 

But why the hell would I carry that around? 

Well, this works exceedingly well for quick, eco-friendly, (if I remove them on my way back out) and very effective blazes in case I find I've been misplaced and need to do a little controlled exploring in order to find myself again.


Even with all that stuff crammed into the mesh pocket, the top pocket of the brain is surprisingly roomy and also easy to get into during a hike without having to unhook anything, making it a great place to stick more crap, including the stuff I'll likely use during any normal hike. Like lunch!

Starting at the top center in the photo above you see my typical lunch. A foil packet (the new version of the tin can with all the same long-term food-protection properties but lighter and easier to store and open) of tuna and a small sleeve of Ritz Crackers. The crackers deliver a solid 220 calorie jolt with 12 grams of warmth-producing fat. Pair that up with 70 calories and 14 grams of protein from the tuna and that's just about perfect for the active hiker. I keep all this as well as a paper towel tucked into a zip-lock. (I reuse the zip-locks until they won't seal anymore, then they still have one more life holding the nasty trash I've picked up along the trail until I can get to a proper disposal container.) This 'lunch' bag is something I add to the pack just before setting off on a hike.

Just to the right of my lunch is another zip-locked package, but this time with two 'meals' in it. It too has packets of tuna and a paper towel, as well as two packages of foil-packed 'crackers-coma-vegetable'. The difference being that this package of food, like most everything else that makes up my day-hiking kit, stays in my pack all the time and I don't plan on eating it under normal circumstances.

So what's this extra food all about?

Well in addition to prioritizing the shelter-water-food trio there's another set of survival assets that will determine how well you perform under duress. These are your mind, your body, and your skill-set.

We all know that during stressful times children that are provided some sort of normalcy, even if it's just holding onto a favorite toy or eating a bowl of SpagettiOs, function better both during and immediately after a disruptive event than those that aren't offered that normalcy.  Well studies have shown that if you provide the adult mind with even the illusion of normalcy it also functions better. (Ya-gota love those university psych departments and the people that volunteer for their studies!)  

True, food is last on the trio of survival priorities but under stuck-in-the-wilderness conditions it may be the easiest way to inject a moment of 'normal' into the situation and refocus the mind, so I carry this package of 'emergency mind food'.

After that long, cold night unexpected spent out on the trail somewhere a quick meal, though technically not nutritionally critical at this point, is a great way to kick-start your mind so you can better get on with the business of extracting yourself from this situation.

When I was a scout we once took a week-long canoe trip down Michigan's Rifle River (significantly wilder and more remote than it is today) and the boxed meals we took with us included something called Bolton Biscuits which were dense, almost indestructible cracker-like things. It might have been the circumstances, but they were a particularly satisfying trail-food that we looked forward to smearing with the little packets of jelly each evening. Those "crackers-coma-vegetable" in my emergency-meal-packet are the closest thing I can find to Bolton Biscuits these days. Though they are expensive, as is everything in the MRE line of foods that they come from, these crackers, unlike the sleeves of much less expensive Ritz crackers which will get stale in a couple months and turn to dust if knocked around in the pack too long, are pretty much indestructible and survive being in the pack hike after hike just fine.

And if you open the foil packet these crackers are packed in carefully it can double as a cup or even a tiny cook-pot once you burn the tan outer layer off it.

Anyway, continuing around the photo, clockwise this time, the next item is a zip-lock with yet another paper towel (staying clean-ish- is another one of those mind-game things that helps us function better.) wrapped around my nested set of fork, spoon, and knife. Surprisingly, eating implements are in the top 5 list of things backpackers consistently forget to take with them, so why not just keep them in the pack all the time?

In yet another zip-lock, (actually out of the zip-lock for this photo) there at the bottom-right, is my poop-kit. A small trowel (that I can also use to dig a hole for my solar water still!)  a wad of toilet paper, a couple moist-wipe towelettes, and a few more zip-locks for packing out the used paper and wipes. (I know! So many zip-locks! But they are light, do a great job of keeping things organized, and have many potential uses, such as a container for collecting berries, a dry-bag for my phone, and are useful even beyond just being a bag - did you know that if you put an ounce or so of water into a bit of plastic and carefully twist it tight around the water, you create a sphere that can be used to focus the Sun's rays and start a fire? Admittedly this takes some practice and patience and works better with thin, cheap bags and really well with cling-wrap, but still - - -)

Starting back up the other side is my field water-color set consisting of a tiny pallet and a couple self-contained water-brushes in the black bag and some pre-cut paper protected by the brown cardboard. Although, to be honest I'm currently rethinking carrying this with me since I very rarely seem to use it, preferring instead to take photos and do my painting back at my bench.

At the top-left is my first-aid kit which I'll come back to in a few minutes, but first, there in the middle looking something like a couple small sponges, is a final bit of emergency ration that is aimed more at the body part of the asset trio rather than the mind.

Even though we can go for days without eating and suffer few consequences, the body runs on calories, especially when it comes to generating warmth, and since there is a relatively easy way to supply those in an almost palatable, very calorie-dense form, why not?


These emergency ration bars cost less than a dollar an ounce and have a reasonable shelf life. (For comparison, for the the most basic version of pemmican, the original high calorie, long shelf-life food, you pay $2.50 to $3 per ounce.)


The down-side is that the nine 400 calorie squares are packaged in a single pouch, so once opened - well - there goes the shelf-life for the leftovers! So I use a vacuum sealer and repackage the squares into 4 sets of two bars each. (The ninth bar? Well someone has to test this stuff out don't they?)

Lemony flavor or not, these things are not going to win any culinary awards, but the whole point is calories, which they have! In fact, for the sake of your digestive system I recommend eating half a square then waiting an hour to eat the other half. My strategic plan is to eat these, one square per day, at the end of the day when the influx of calories will set my body up for combating the cold night and to reward myself for all the work I did towards self-rescue during that day. (Yep, mind-games, but they are important!)


OK. Now the first-aid kit.

Look on-line for these things and you will see that they can range from a briefcase sized kit worthy of an EMT seeing 3 or 4 cases of severe trauma per day, all the way down to - well nothing for those that aren't carrying one at all.

I used to carry pre-packaged first aid kits even though I had no idea what I would do with half the stuff in even the smallest of them, but after years of actual experience I threw away the fancy boxed kits and created one of my own populated with things I have used in the past. (Look out, my minimalist is showing here!)

A few adhesive bandages of course, some antibiotic gel - which also makes a good lip-balm, a couple  well-sealed tabs of Imodium because becoming dehydrated through diarrhea out on the trail is pretty debilitating, and a tick-key for when I'm hiking in the buggy Midwest.

That pretty much encompass my whole first-aid kit, though I do have a few other things tucked in there as well.

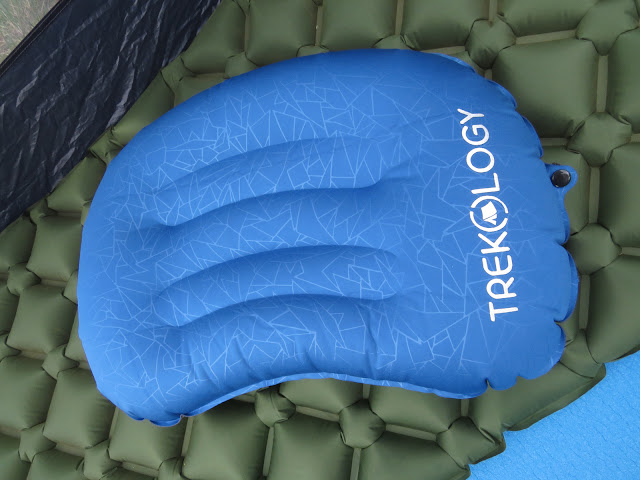
That yellow paper is repair patch material for my air-mattress and pillow. (that I use when backwoods camping) I didn't have anywhere else to put the thing that would ensure I didn't lose it or forget to take it with me, so there it is.

Toothbrush with a fair bit of dental floss wrapped around the handle because of that whole clean-makes-you-feel-better thing. 

Emergency Mylar blanket. Again because this is something you should always have and it seems like a good place to keep it. (And yes, it's called a blanket but with shiny-side out it also makes a decent sun-shelter that can help protect from the heat.)

And finally a heavy-duty needle jammed into a wooden plug to protect the pointy end. This plug can also be used as a thimble for shoving the needle through thick material.

True, this needle could probably be used to sew up a serious cut, but I doubt I'd be able to do that because I'm just too squeamish about these things, (I'm constantly having to close my eyes right now what with all the news reports about vaccines that use stock footage of people getting needles jammed into their arms!) opting instead for pulling the wound closed as best I could with the bandaids then using some of my cordage to secure the bandanna around it. But if I were to break a pack-strap or get a rip in my poncho I can use this needle to patch things up.

How?

Remember that dental-floss wrapped around the toothbrush. That stuff is remarkably strong. Also, the inner core of para-cord, of which I have quite a bit with me, is seven individual strands, and each of those is made up of three smaller strands, so I have enough "thread" to build a blimp let alone close up a rip or rejoin the ends of a broken strap.


OK, if you made it this far you've figured out that I day-hike with what seems like a whole-lota crap. And all of this, with the exception of the day's lunch and extra clothing, stays in my pack all the time.

To take a hike, regardless of whether it is a one mile round-trip jaunt down to a viewpoint or a 12 mile hike into rough country, I throw lunch into a zip-lock, grab the pack and my hiking sticks from the back of The Van, turn on the GPS, and set off. No fiddling around loading up the pack with stuff stashed all over The Van, or editing the gear I carry to match the intended hike. Either of which has the potential for leaving something critical behind. (The intended hike doesn't always turn out to be the actual hike!) And I'd like to point out that in my lifetime I have hiked several thousand miles, some if it in some pretty remote and rugged places, the vast majority of it by myself, and I'm still here.

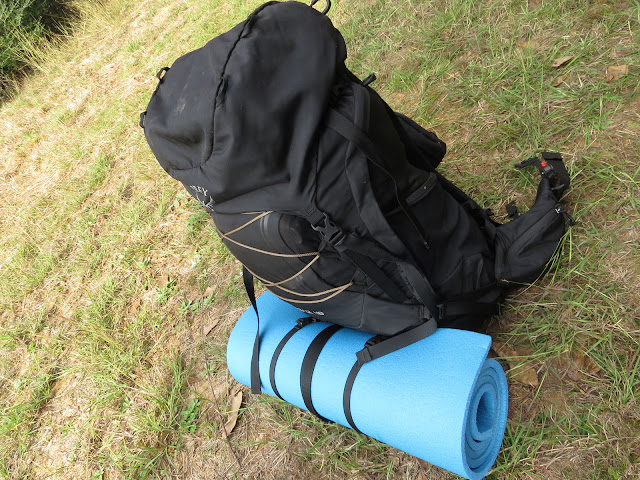
With all that gear listed above loaded into my pack you can see that it weighs in at 18.6 pounds. Add a pound and a half for the camera that I was taking this photo with and it's up to 20.1 pounds. Subtract the 3.6 pounds the pack itself weighs and 6.6 pounds for the three liters of water in my bladders, and all that gear, including camera, weighs in at just about 10 pounds, which doesn't seem all that bad to me.


Yep, even with all the crap I carry, a pack that's big enough for modest back-country camping trips just may be a little overkill when it comes to day-hiking, but the alternative is to carry two separate packs in The Van. And in my case, lazy as I am about packing, that means two complete sets of hiking gear so each pack is always pre-loaded and read to go.

So I think I'll just live with overkill.

Whatever you carry on your day-hikes - happy hiking and stay safe!