
Ahhh yes! The guy-line tensioning toggle.
Anyone who's ever camped, or put up a canopy, or erected a badminton net in the back yard, has wrestled with encountered one of these. Or more likely, more than one kind of these because they come in a bunch of different shapes and sizes,

each of which works a little differently than the other.
But they all share some common traits.

They'er all persnickety little things to deal with.
They all add bulk to your gear while lightening your wallet.
Each fits only a specific size of line.
And they all come out of the stuff-sack snarled up as if they're in the middle of a '60's orgy - - Every time!

But what if I told you there's a Wonder-Toggle out there that works on any size and type of line,
Can adjust a guy to any length and tension in seconds.
Can be completely removed even faster.
Doubles the power of a 'traditional' toggle so even Grandma can adjust the tension anywhere from snug to Holy Cow I Could Play A Tune On That!.
Won't loosen or fall apart when shaken by the blusteryest of winds.
Unlike 'traditional' toggles allows you to pass the line around an anchor point such as a tree or tall pole without removing the toggle first.
Adds exactly zero weight or bulk to your gear.
And is free?

See it here?
This Wonder-Toggle I'm talking about?
Right there on this line, all ready to go into action?
No?

How about now?
Actually it's more properly called a trucker's hitch and while it is a wonder, it's nothing new. In fact it's been around since before trucks, which makes this continued infatuation with all these various new-fangled and 'ingenious' toggles all the more baffling.

The Wonder-Toggle might look complicated but without being in any particular rush, once the standing end is anchored and the guy wrapped around the second anchor-point, be that a post, stake, or tree, it takes me about 10 seconds to throw the hitch, tension it just right, and snug it down.
Admittedly there are a number of different ways to tie this hitch and several additional variations, mostly aimed at making it even stronger or more robust such as when securing heavy loads on - well - trucks, but what follows is the way I learned to throw the hitch many years ago and still use today.
This will probably seem complicated at first, but so do the diagrams of even the simplest knots in instruction books trying to teach you how to tie them. I promise, if you grind through this instructional a few times it will become easy. (Of course I may or may not have had my fingers crossed just now - - -)
In my experience, once you get it down, a 10 second trucker's hitch will become second nature and you can finally ditch those pesky toggles.

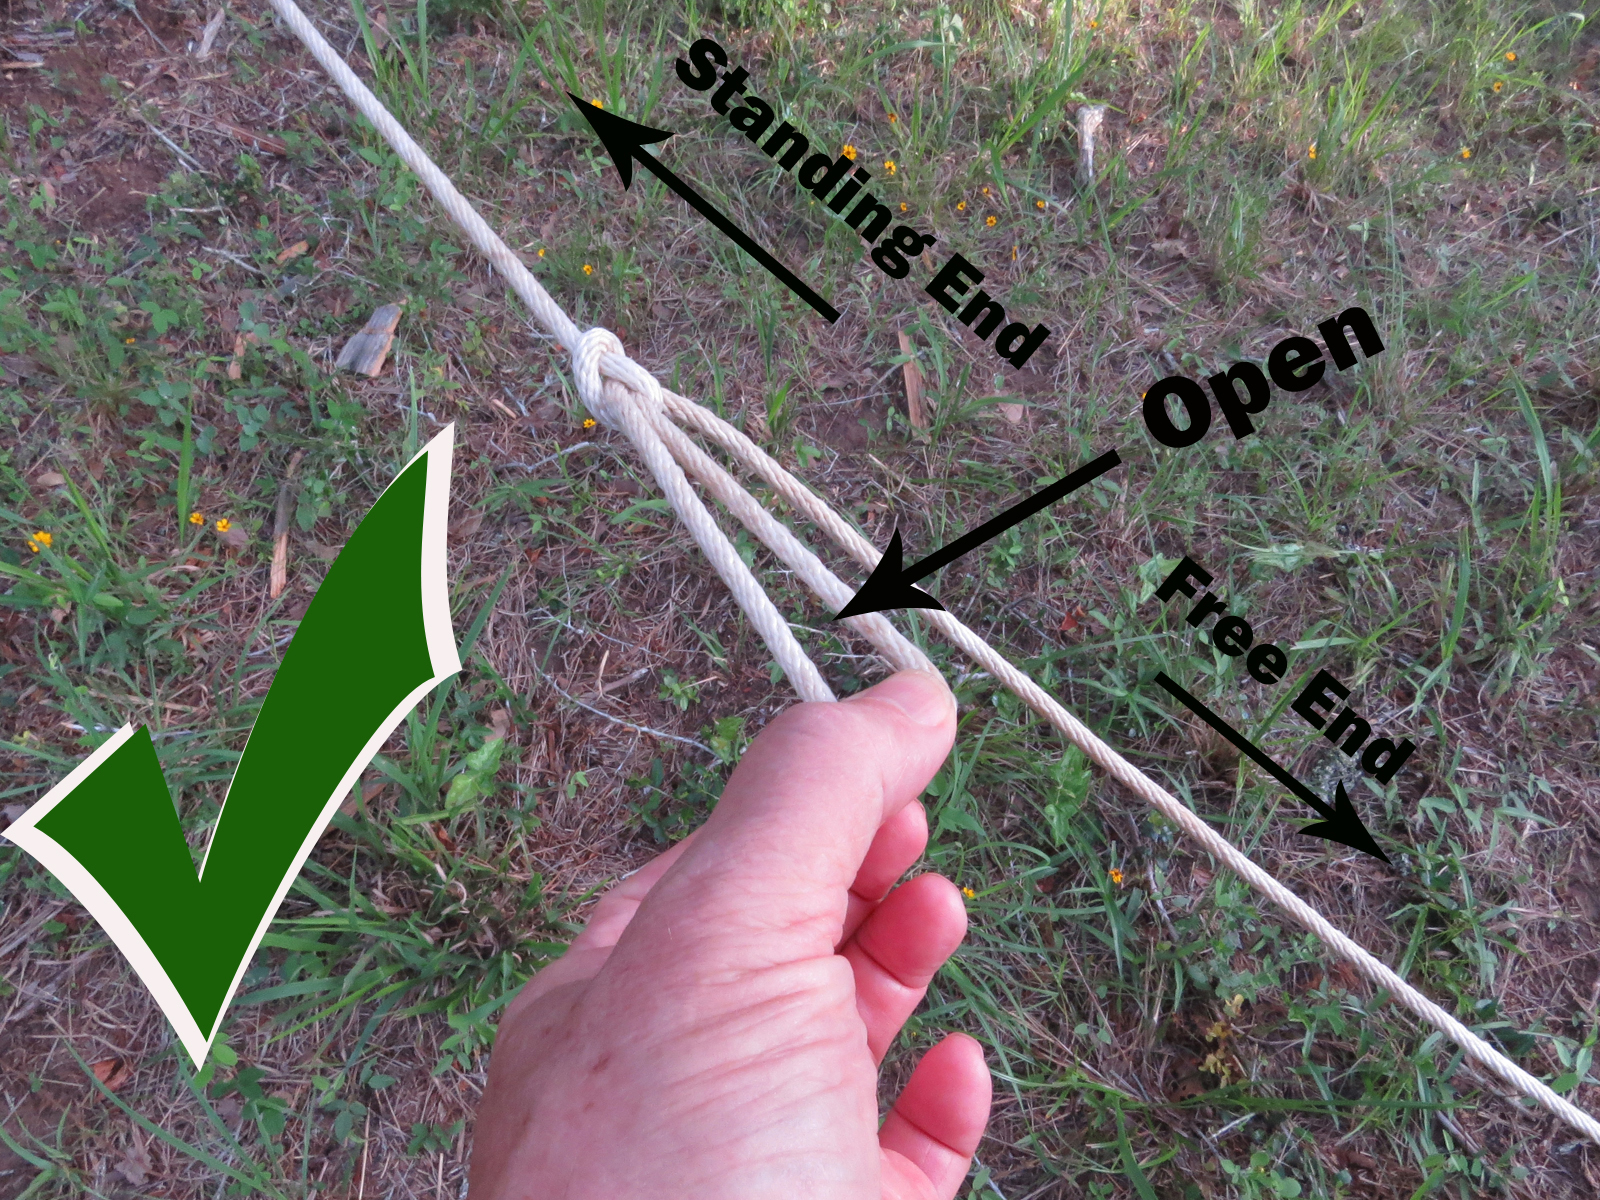
But before I get started, a couple of terms to help keep things straight.
The initial anchor-point is the end more or less permanently attached.
The standing end of the line is the one closest to the initial anchor-point.
The secondary anchor-point is - well - it's not that hard to figure out which one that is!
The free end of the line is the one closest to the secondary anchor-point.
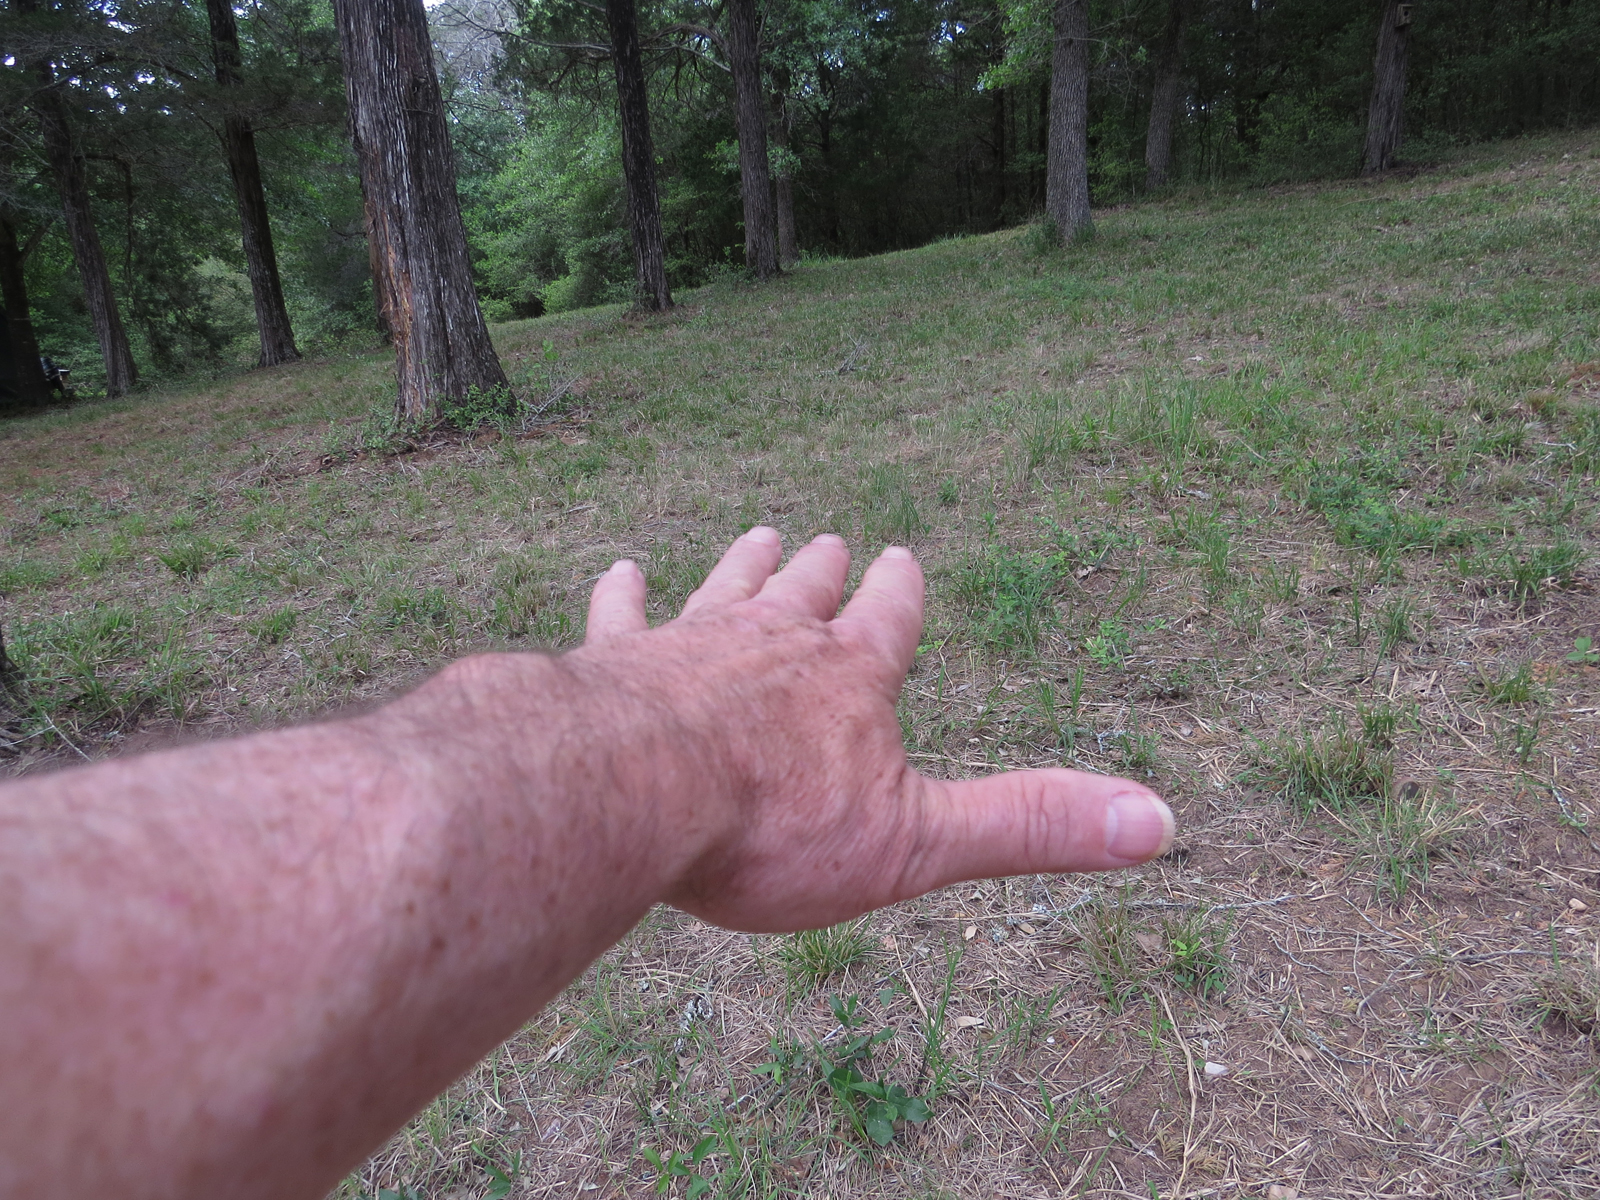
The dividing line between the standing end and the free end is where-ever you happen to be - well - standing. In the case above everything to the left of my hand is the standing end and everything to the right is the free end.
The loose end is - you guessed it - the loose end of the free end.
And a bight is just a quick and fancy way of saying a bend or kink in the line.

So, back to the Wonder-Toggle.
The first thing, if it's not already done, is to secure the line to the initial anchor-point. That's the end that will stay put as you work on the rest of the hitch.
In the case of a tent or canopy the initial anchor-point is usually attached to said tent or canopy.

How you secure the initial anchor-point is not important as long as it stays put. I prefer to use a bowline because it is simple, stays in place, and never jambs so is easy to untie, but a slip-knot, a clove-hitch, an overhand knot, will all do nicely under the right circumstances.

Now that the initial anchor-point is secured take the free end of the line over to the secondary anchor-point, which could be a stake in the ground for a tent or another tall support for a ridge-line.
While standing in front of this point and facing it with your dominate shoulder (right if you are right-handed, left if - well - you know) pointing back to the initial anchor-point - in my case, as a left-hander, the tree the initial anchor-point is secured to is off to the left of this photo - pass the free end behind the secondary anchor-point, (That behind bit is kind of important for consistent results!)

then bring the line around in front of the secondary anchor-point so it's heading back towards the initial anchor-point.
Hold the free end there loosely with your non-dominate hand.
Now here's the slightly tricky part, but only tricky the first couple of times you do it, after that it will seem normal.
Hold your dominate hand out in front of you with your palm down and thumb out (Your thumb will be pointing back towards your non-dominate hand at this point.)

Keeping your fingers straight and thumb out, roll or twist your arm 90 degrees so your thumb points down and your palm is facing the initial anchor-point.

Continue to roll (or twist - whichever terminology works for you) your hand another 90 degrees in the same direction so your thumb is now pointing at the initial anchor-point and your arm is twisted up like the string on one of those button-spinners your grandma used to make for you. You know, that kid's toy where the sharp edge of a button is spinning impossibly fast just a couple inches from your eyes as you do your damnedest to break the string it's spinning on!

Keeping your thumb out of the way, wrap the fingertips of your upside-down hand around the line from below.
And apologies. Statistically most of you are right handed and these are all photos of a left-hander throwing this hitch, so you right-handers will have to reverse the images in your head.

Now, keeping hold of the line with your fingertips, un-twist your arm

keeping your thumb out of the way as you do


All that effort, which in real-time takes no more than a second and a half - if you're moving slow - creates a simple loop in the line, but it creates the loop exactly the right way every time.
Rather ingeniously, if I do say so myself, I label this 'Loop 1'.
Here, and for the next few photos, in an attempt at clarity I've tinted the standing end of the line, the one attached to the initial anchor point, blue and the free end, the end wrapped around the secondary anchor point, yellow.
Again, as a left-hander, here my left thumb is pointing back towards the initial anchor-point, the free end of the line is heading the other way and has been passed around behind the second anchor-point and the loose end of the line is in my non-dominate hand out of frame to the right. (Remember, you are holding the loose end of the line loosely with your non-dominate hand so there is enough slack in the line to form Loop 1 without choking your fingers.)


and pinching the free end part of the loop between thumb and a couple of fingers

so you can pull a bight back through Loop 1.
Without letting go give this new loop, which I call Loop 2, (Oh man! How do I come up with these genius ideas!?) a tug away from the initial anchor-point to collapse Loop 1 and set Loop 2.
If you did everything right Loop 2 will remain open as you pull it away from the initial anchor-point.

If instead, Loop 2 pinches down on your fingers as you tug it away from the initial anchor-point you were probably standing on the wrong side of the line (i,e, dominate shoulder facing away from the initial anchor-point instead of towards it) when you made Loop 1 with your upside-down hand.
This is no good. Try again!
.jpg)
Now that the hard part of this hitch is done it's time to bring your non-dominate hand, the one holding the loose end of the line, back into action by feeding that loose end up through Loop 2.

Still using your non-dominate hand give the loose end a tug away from the initial anchor-point to tension the guy-line. Notice that Loop 2 is now acting as a pulley, amplifying the power of your tug.

When the tension is right use your dominate hand to pinch the free end of the line tight against the very tip of Loop 2 to temporarily hold it in place for the next couple of steps.
The first of which is to make sure the loose part of the free end is draped over top of the taut part as in the photo above to create yet another loop. - Yeah, OK, let's call it Loop 3 - but this is getting kinda boring.

This creates yet another loop, Loop 4, but I promise, that's the last one!

As you do with your shoelace knot, grab the bight of Loop 4 and give it a jerk, this time towards the initial anchor-point, to collapse Loop 3 and snug the hitch down. Again, normally I would be doing this with my non-dominate hand while my dominate hand kept the 'pinch' secure until this final part of the hitch was snug, but - well, camera and all - -

And that's it!
You can let go of everything now and and your tensioned guy-line will stay right there.
Just remember, because of the 'pulley' action of Loop 2 you can use this trucker's hitch to apply a whole lot of force to the guy-line and while guitar-string tight is what you want for a ridge-line or clothes-line, that's not always what you want when guying out a tent or canopy. In addition to excess tension over- stressing whatever the initial anchor-point is attached to, you really do want a little bit of give in tent and canopy guy-lines so that when the wind hits everything gives a little and spreads the load out over multiple components decreasing the odds of a single-component failure.
OK, this has gone on for a while but to finish up real quick, here's the 3 second process for breaking down a guy tied off with a Wonder-Toggle - - I mean a trucker's hitch.

Like with your shoelaces, grab that loose end and pull until Loop 4 pops free, taking Loop 3 with it.
At this point you can either tighten or loosen the guy by adjusting the tension, re-pinching, and throwing Loops 3 then 4 back into place.
But if you are breaking things down rather than re-adjusting,

then pull the free end completely out of Loop 2,

grab hold of the line on both sides of Loops 1 and 2 and pull them out of the line too.
Your wonder-toggle is now completely gone.
Because there's no hard and bulky toggle left to tangle things up or abrade the stuffed, rolled, or folded canopy or tent I generally leave the initial anchor-points of my guy-lines attached and and just pack them up along with the tent or canopy so they're ready for next time.

No comments:
Post a Comment