OK, as I stand here at my workstation out in the (Unheated) barn with all the doors closed because of the 35 degree rain that's falling outside, which is definitely not helping motivate me to do much of anything else, I'm finally getting around to wrapping up this series of What If posts.
As I worked on this project I wandered off the path a few times
(remember this post? Just like when I'm hiking, even with a map to follow I still tend to wander off the trail. . .) and came up with some variations on the design, a few of which I'm going to lay out here whether you want me to or not!!
Tea; and sleep; for two:
The obvious variation is jamming in sleeping space for two. But, even though I briefly gave in to temptation during the design phase, I'm not going to go there because it was just so predictable and boring and blah. (I know, I know, boring and blah are redundant, but so were the results of that brief detour so it warrants being repeated.)
Fitting a double-wide bed into the camper turned it into pretty much any other generic 9' camper you can buy off the lot. It created a space that was cramped and uncomfortable and doesn't function all that well in any of it's modes; drinking, eating or sleeping. (Iconic small boat designer Phil Boldger often said the ideal boat would drink 6, eat 4 and sleep 2; I guess he was more sociable than me. . .)
Anyway, wandering off down this path dragged the camper far from the customized, fits-me-just-right result I was looking for, so I came to my senses and abandoned that route and deleted those scribbles, but there were a few other variations that I followed through on and kept.
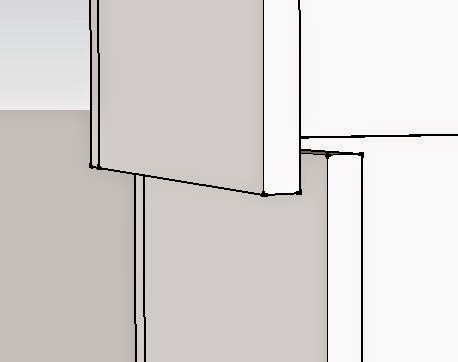
Alternative bed/chair setup:
I couldn't quite leave my original bed/chair idea alone and ended up creating this alternative
,
which is a scaled down version of the venerable dinette.
If
you recall, because of the height of the pickup bed rails, a layout
such as this puts the seat too high for comfortable sitting. I
got around that by installing a raised floor for my feet to rest on. There's storage space below this floor where I
can keep some books and other heavy stuff and it has been
designed to be lifted out easily for better access, though I'm not sure that will be necessary, except maybe for sweeping.
Like
a typical dinette, it can be converted into a bed, but instead of using
the table as a filler over the foot-well, the cushion that is otherwise the back-rest is
mounted to a board so it's cushion and filler all in one.
This board, along with a
couple of rub-rails mounted on either side of the escape window, keep the cushion
from flexing outwards and pressing up against the escape window when
sitting back against it.
To get the table out of the way
for sleeping, since it's not going to be used as part of the bed, it
hinges upwards and is held there by a simple latch. It does make getting into the 'fairing' storage more challenging but then what's life without a challenge or two?? This setup has the added advantage of easily getting the table out of the way when just lounging around or trying to put your socks on, something a typical dinette isn't very good at.
I had
to reduce the size of the cupboard over the seat to make sure there was
enough headroom to avoid head trauma, but only by a few inches in
height and depth.
Turns out that even though the seat might not be as comfortable as my original idea with an Adirondack inspired semi-recliner, I really like this
setup, probably because it reminds me of when I was a kid and family regularly
gathered around the dinette in one or another of our old trailers.
The pop-up:
The pop-up strategy is one I've used before, three times before if my memory is holding up.
The concept is simple. When parked the top is lifted to provide the headroom and space necessary for civilized hanging-around. When going down the road the top is lowered so you're not dragging extra air from one place to the next. This works out pretty well because, generally speaking, there will be plenty of air waiting at the next campsite anyway.
On the left (In case it wasn't obvious.) is the camper in the raised position. In this configuration it has the same headroom as the original fixed-height version though less storage. On the right the lid is lowered and the camper is road-ready. (As long as I remember to close those two vents first!!)
I don't know about you, but for me this version just begs for a big, beefy, macho 4-wheel drive truck under it for climbing mountains and bashing through the woods.
Implementing this version takes a bit more thought and work but not as much as you might think. (But you shouldn't trust me on that since I've done this before.)
By slicing the camper shell in two
horizontally and pulling all four walls of the upper section 2.5” further out,
(The walls are 2" thick so this give a half inch clearance all the way around.) the upper section now fits over the lower section like a shoebox lid; a lid
that can be lowered by 23” for slipping down the road as easy as snot through a 2 year old.
By extending the walls of the upper section downward, I've also created a 2" overlap between the upper and lower sections when in the raised position to improve overall stability and weather sealing.
Weather sealing is done with brush seals, like those used along the sides
of commercial roll-up doors. I didn't bother drawing them in but by putting one seal on the top
edge of the lower section brushing against the inside of the lid and another on the
bottom edge of the upper section brushing against the outside of the lower box, you get a double
seal that will still slide easily during the raising and lowering process.
To make sure everything stays lined
up where it’s supposed to be, I would use heavy-duty stainless steel drawer
slides (Which just happen to require that same half inch clearance I left between upper and lower sections. See how neatly things work out!) with the fixed portion mounted vertically on the outside of the lower section and
the mating sliding portion mounted to the inside of the upper section.
A pair of these slides mounted on either
side of the door will ensure the door-jams stay lined up where they belong as
well as keep the rear of the upper centered side-to-side over the lower section. And one slide each just behind the
windows in the side-walls will help ensure the long walls of the upper
don’t bow outward, (Though they are already pretty well braced by the full length upper cabinets which I'll get to in a moment.) as well as keeping
the lid centered front to back. And one more slide in the front
wall will keep the front of the two sections centered.

I prefer this 'box lid' approach as opposed to raising just the roof and filling in the gap with canvas for a few reasons. Insulated hard sides - well - insulate better than canvas; Bears find the hard sides more difficult to claw through than canvas when they're trying to get to the cookies; The hard-sided version is a little more stable than canvas sided when raised, something to consider when facing storms up there on top of the mountain where that macho truck got you.
Some additional modifications
to the design are required to make this whole thing work, but maybe not as many as might first appear.
On the exterior the ‘fairing’ on the
front of the camper is eliminated, along with the storage it provided. (It would just come down and crush the pickup cab otherwise. . .) So that there is still a little bit of aerodynamics involved, I angled the front portion of the roof down to within a few inches of the truck-cab roof when in the lowered position. This doesn't hurt anything (Other than a slight loss of storage space in the upper cabinets.) since you can't stand up in that portion of the camper anyway.
And the lower door opening is narrowed by a few inches so the lower door
can swing open past 90 degrees before hitting the edge of the upper door opening.
As you might imagine, a few changes need to be made inside
as well.
The cabinet over the refrigerator
has to go so there’s room for the lid to lower. This leaves a large shelf on
top of the fridge that can be used with the lid up but must be emptied before lowering
the lid unless you've got something you want to crush. I extended this shelf all the way to the rear wall and mounted a couple wire drawers next to the fridge to recover some of the lost pantry space.
The hanging space opposite the fridge had to be eliminated for the same reason. I put a couple wire drawers into the remains of the closet space for storing folded clothes.
In the two previous images you can also see that I have extended the upper cabinets the full length of the camper shell on both sides. I had to reduce the top to bottom dimension of the uppers by 4" so they would allow the top to go all the way down, but was able to make them 2.5" deeper from front to back, so recovered a little of the lost storage space. These full-length uppers contribute greatly to the structure of the upper part of the shell, stiffening the side wall and bracing the roof, and are designed to rest on the top edge of the lower section when in road mode, which helps stabilize everything for the twists and bumps of less than perfect roads and take the load off the actuators. (Relax, I'll get to those in a moment.)

One casualty of this version is the air-conditioner I so carefully designed in in the first place. There's just no wall space left to accommodate that through-the-wall unit in this pop-up version. I did draw in a second roof opening that could be used for a traditional RV type air-conditioner but I can’t help envisioning this rig on top of a burly 4-wheel drive
truck clawing it’s way far into the back-country where shore power to run an
air conditioner is never to be found, so I put a second vent into the opening instead.
The faucet also needs a little thought.
With less than 6" between counter top and upper cabinet when the lid is lowered, a traditional sink faucet isn't going to work. A vanity faucet would fit but make it difficult to fill anything other than a coffee cup. Short of sourcing a very expensive
fold-away faucet, (They can be found on the European market if you must have one.) an alternative that I like is
to simply replace the faucet with a kitchen spray head instead. You know, that
little thing to one side of a normal kitchen faucet that’s attached to a
flexible hose and pulls up out of the countertop when you need to use it. That
way it clears the uppers when in road-mode since the spray head is only a few inches tall, but I can pull it up as high as I need to fill a container or pot.
Getting the lid to go up and down would be the job of some
linear actuators. I’ve used both hydraulic
and electric in the past and though hydraulic worked just fine, electric is my
preferred type since I already have an electrical system on board. And screw
type electric actuators are going to stay wherever they are left so there’s
no need for safety pins or latches as there would be with hydraulic actuators.

A pair of actuators (I've colored the actuators red in these raised & lowered images to make them more visible.) would be placed in the rear corners of the shell and another pair in the front corners of the under-counter cabinets. (With the roof angled down for aerodynamics there's not enough height left to fit them in the front corners of the shell.) These actuators will need to go up through the bottom of the overhead cabinets all the way to the ceiling, but they will be right at an internal partition as they pass through so won't be in the way too much.
So, some compromises, but if I decide I need a lean, mean, back-country version of the camper, there it is.
The throwback:
If done right, ugly can be beautiful, but I'm not on par with designers like Wright and Boldger, so my ugly tends to be just that; ugly. Which is incentive enough to try gilding the lily. As additional incentive, as I was working on this design I saw several vintage trailers being restored; so I just couldn't help myself,
and ended up creating my own version of a retro-ized camper.
The only change to the interior is to modify the outside top corners of the cabinetry to the new shape of the shell, and eliminate the upper over the seat, (It just got too small to be useful, especially after I lowered the roof by several inches to get that old-time feel to the overall proportions.) everything else can stay the same.
Final words:
So there you have it, this project from start to finish. At least the finish of the design phase. If I ever need to implement my What If option I can dust this off and build it. And I think I would build the Retro version with the dinette type seating/bed, even though it would be more complicated than the straight-sided version because of the angles and additional panels, but what the heck. . .
Oh, by the way, as I was working on this design I wandered into my enclosed cargo trailer several times and I got to looking around and thinking about layouts and - well - that's for another time. . . maybe.