You can’t tell in this photo of the CO detector in The Van,
but the green light is actually alternating between green and red.
I know the 12 volts feeding the detector isn’t low so the
dang thing must be telling me it’s ready to retire.
These things operate off a heated platinum wire which is a catalyst
for this chemical reaction:
Sensing: CO + H2O -> CO2 + 2H+ + 2e-
Counter: ½O2 + 2H+ + 2e- -> H2O
Overall reaction: CO + ½O2 -> CO2
Counter: ½O2 + 2H+ + 2e- -> H2O
Overall reaction: CO + ½O2 -> CO2
Cool huh!!! (Oh man, what is wrong with me that I like figuring
things like this out????)
And eventually that wire is going to have had enough with all
this reacting and quit.
Because of this, and in order to play it safe in our litigious
society, the manufacture prints right on the front of the detector that it is
to be replaced 60 months after installation, but that reactor inside there
knows when it isn’t reacting well anymore, hence the alternating red/green
light when it really goes bad.
As always, the first step in the replacement process was to disconnect the power. I could have pulled the fuse when I started this replacement but it’s easier just to flip the 12 volt disconnect switch
As you can see, my old detector was manufactured the last day of
July 2009, but not installed and heated up, which is when the clock really
starts, until sometime in early-2011.
Because the detector is mounted up high, clear of the worst of dust and other contaminants, my little platinum wire lasted about 12 months longer than the stated 60 months.
If you look close at this photo you can also see where I've cut
the power-leads off flush with the case. I’ll get to that in a moment.
I found it difficult to find a replacement detector that just does CO. Since most RV’s also have a propane system
on-board it’s not surprising that the combo-detectors are much more popular.
No big deal, it’s not going to hurt to have a propane detector
as well as the CO detector.
I made sure to buy the replacement from the same manufacture as
the original so it would have the same footprint. In fact the old and new detectors share the same
case, just different printing on the front.
The Van’s detector is mounted above the electrical panel in an enclosure above the kitchen counter-top.
Despite there being loads of room for wire-slack up there in the enclosure,
when Sportsmobile installed the detector they kept wire-lengths to a minimum
which meant the barrel-splices they used were buried inside the enclosure and
difficult to reach.
Also, since everybody knew this detector was going to have to be replaced
at some point, I’m not sure barrel connectors
were the right choice.
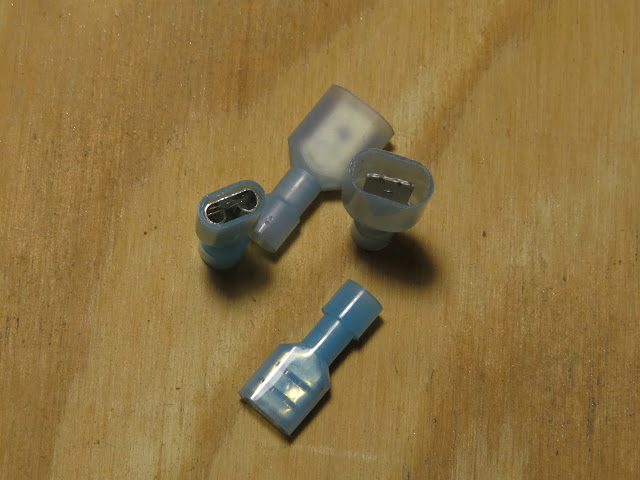
So I dug up some spade connectors to use on the new detector
instead. Fully insulated spade connectors since right there next to the
electrical panel is not a place you want bare electrical connections hanging
about!
I could have used standard spades and wrapped them in
electrical tape but during the summer around here it can get pretty dang hot up
there just under the metal roof. Just the kind of conditions that weakens adhesives and lets electrical tape unwrap.
The new detector got the male spades on the ends of its
leads.
Then, in order to have enough wire to work with comfortably, I cut the leads off right at the case of the old
detector and crimped on female spades.
Technically I should have put one male and one female spade
on the detector and the corresponding mating-spades on the power leads, that way even
a complete idiot can’t screw up and connect the power backwards. But when
buying insulated spades in small quantities (Remember, I’m going to need spades
for a new detector in 5 or 6 years) they come packaged as either males or
females. By using males on both leads of the detector, now I only have to buy
one small package of males when it comes time to replace it, rather
than one small package each of male and female, only to use a single spade out of each
package and have the rest sit around until I’ve forgotten where I put them and
have to buy a set of new packages all over ag—well, you see where this is going.
Besides, complete idiots should not be messing around with electrical stuff anyway.
Anyway – the new detector slipped right back into the slot the old one came out of and I
even used the original screws to hold it in place.
After turning the power back on it
took about 10 minutes for the little platinum wire to heat up to operating temperature.
Not because the wire gets that hot, but because the current though the wire is
so low (remember, battery powered detectors can run for a year on one small
battery) it takes that long for it to heat up. Once the green light was burning
steady I gave the ‘Test’ button a push to make sure the detector was working.
It was. . .
I did this without thinking of hearing protection beforehand
so it was several hours before I could hear The Wife calling me to lunch.
The last step was to replace the old detector’s paperwork in
The Van’s folder of – well, paperwork and manuals, with the new detector’s.
Good for another five or six years!


Very well explained. thank you.
ReplyDeleteHopefully it's not a case of the blind leading the blind!
Delete