Friday, February 20, 2015

Keeping Score

I left camp early this morning and hiked up to the bird feeding station (Pedernales Falls State Park.)

The first half of February is clearly not the best day on the calender for birding, even here in the Texas Hill Country, but this feeding station is a pleasant place most any time with it's courtyard flanked by two glass-front viewing stations, each with seating and photo portals.

Besides, it's not like I had any other pressing engagements.

View from the photo portal of the north-facing station.

As expected, other than the woman scouting for the Audubon tour she would be guiding next week, who was just leaving as I arrived, the station was empty of people, and almost empty of birds.

Almost empty of birds, but not quite.


With the place all to myself I chose the best seat in the house and parked myself there in this quite, gentle spot, but it wasn't long before I was freaking out because I hadn't brought my Sibley Guide to Birds with me and the Audubon lady had already left and now I wasn't going to know for sure THE NAME OF EACH AND EVERY BIRD I WAS LOOKING AT!!!!

OK, head between the knees; take deep breaths; keep it up, you're doing just fine: get your heart-rate back out of the stratosphere; relax; everything's going to be alright. . .


I understand where my need to keep score comes from, why I have a compulsion to label every bird I've seen, identify every tree, count every mile I hike down to the tenth, clock how fast I can get from here to there. It's an evolutionary thing and it's not easy to escape evolution!

After all, how's a girl supposed to know which boy will grow up to be the fastest runner (I don't have to outrun the bear, I only have to outrun you!) and best provider without keeping score? How's a guy supposed to know which is the best woman to spit out his kids and raise them with one hand while gathering firewood with the other if there's no scorecard to rank them with? Or in the more modern context, how are you supposed to know who among the competing hopefuls deserves to make the next step up the corporate ladder or which of the neighbors has the most toys if nobody is keeping score?!


But the hard fact is that evolution is all about creating stock that can survive long enough to breed and raise offspring to the point where they too can breed. This requires lots of different traits, but among the things evolution doesn't give a flying hoot about (Get it!? Birds, owls, hoot!!!) is an individual's ability to be content and find enjoyment in just being there.

But even understanding all this, it still took some effort to overcome my reptile brain and not fret over specifically which of the many types of sparrows those were flitting around over there in the branches, or whether I would know a Towhee if I saw one (The Audubon lady mentioned she could hear a couple of them singing out there somewhere.) but eventually I managed to (mostly) set aside the compulsion for score-keeping and sat back to enjoy the birds just being birds. For a little while there I managed not let the wonders of the Universe slip by unappreciated because I was too busy checking things off on my scorecard.

In addition to the lowered heart-rate and increased alpha brainwaves, the upside of this conscious exercise in overcoming my baser instincts is that I ended up hanging around long enough for Don, the Park Volunteer, to show up for the 0830 feeding. Don is an interesting guy who used to live in the world of corporate finance and now is very enthused about his life wandering around full-time in a vintage 70's travel trailer as a Texas Parks and Wildlife Volunteer. In fact Don was so enthused I'm afraid that by the time we finished enthusing all over each other the bird's morning feed was almost an hour late!

So the take-away here (Oh no! Corporate speak is still part of my language!) is that the scorecard might have it's place, but it isn't always necessary. And clearly, I still need to work on embracing that lesson.


OK, I just couldn't resist: From bottom to top: Northern Cardinal, White Wing Dove, Scrub Jay, Cardinal again, Ladder Back Woodpecker probably young, and something with the wing bars of a Blue Jay but no crest or neck ring so has the head of a Scrub Jay, maybe a hybrid?

Damn! I guess I still have some work to do on putting down the scorecard. . .


Monday, February 16, 2015

Pink Enchantment

Out there north of Fredricksburg Texas lurks a mammoth batholith  of pink granite. (Also apparently called a plutonic but my ancient language skills are not up to explaining why.) To a geologist this igneous batholith is a chunk of roughly 1 billion year old Town Mountain Granite of the Middle Precamrian that intruded into an even older metamorphic schist called Packsaddle Schist.


If that made your eyes glaze over, as it did mine when I looked it up, you might find the little bit of this batholith that sticks up above ground level more interesting. This is a 640 acre bubble that erosion has exposed at one end of the 63,000 acre granite formation (The information plaque in the gazebo visible in the photo above states that that's 3 times the size of Manhattan. For someone that knows Manhattan I suppose that means something, but for the rest of us - huh?)

That bubble is called Enchanted Rock and since 1984 has been part of the State Park system.

The camping here is walk-in tent camping only which is why the van and I were staying some 60 miles away at Pedernales Falls State Park. (There are commercial campgrounds much closer but that just didn't sound very appealing.) With the sun still lurking below the horizon I set off and took a few of the lesser roads, as in cattle guards and low-water crossings, across ranch country to get here.

I approached the park from the east on  FM965 and with the sun behind me had some spectacular views of the monolith as I approached. Unfortunately those views have resulted in about 9 miles of FM965 being designated a no-parking zone and without another set of hands in the van to handle camera duty I didn't get any shots on the way in. I did go looking on the web for a few but apparently very few photos are taken of Enchanted Rock from this approach, at least none I could find. I guess those no parking signs way out in the middle of nowhere really work.

In the photos it's especially apparent, but even in person the scale of the place is deceptive.


I took this photo from near the main trailhead with a 24mm lens and the little red circle marks were


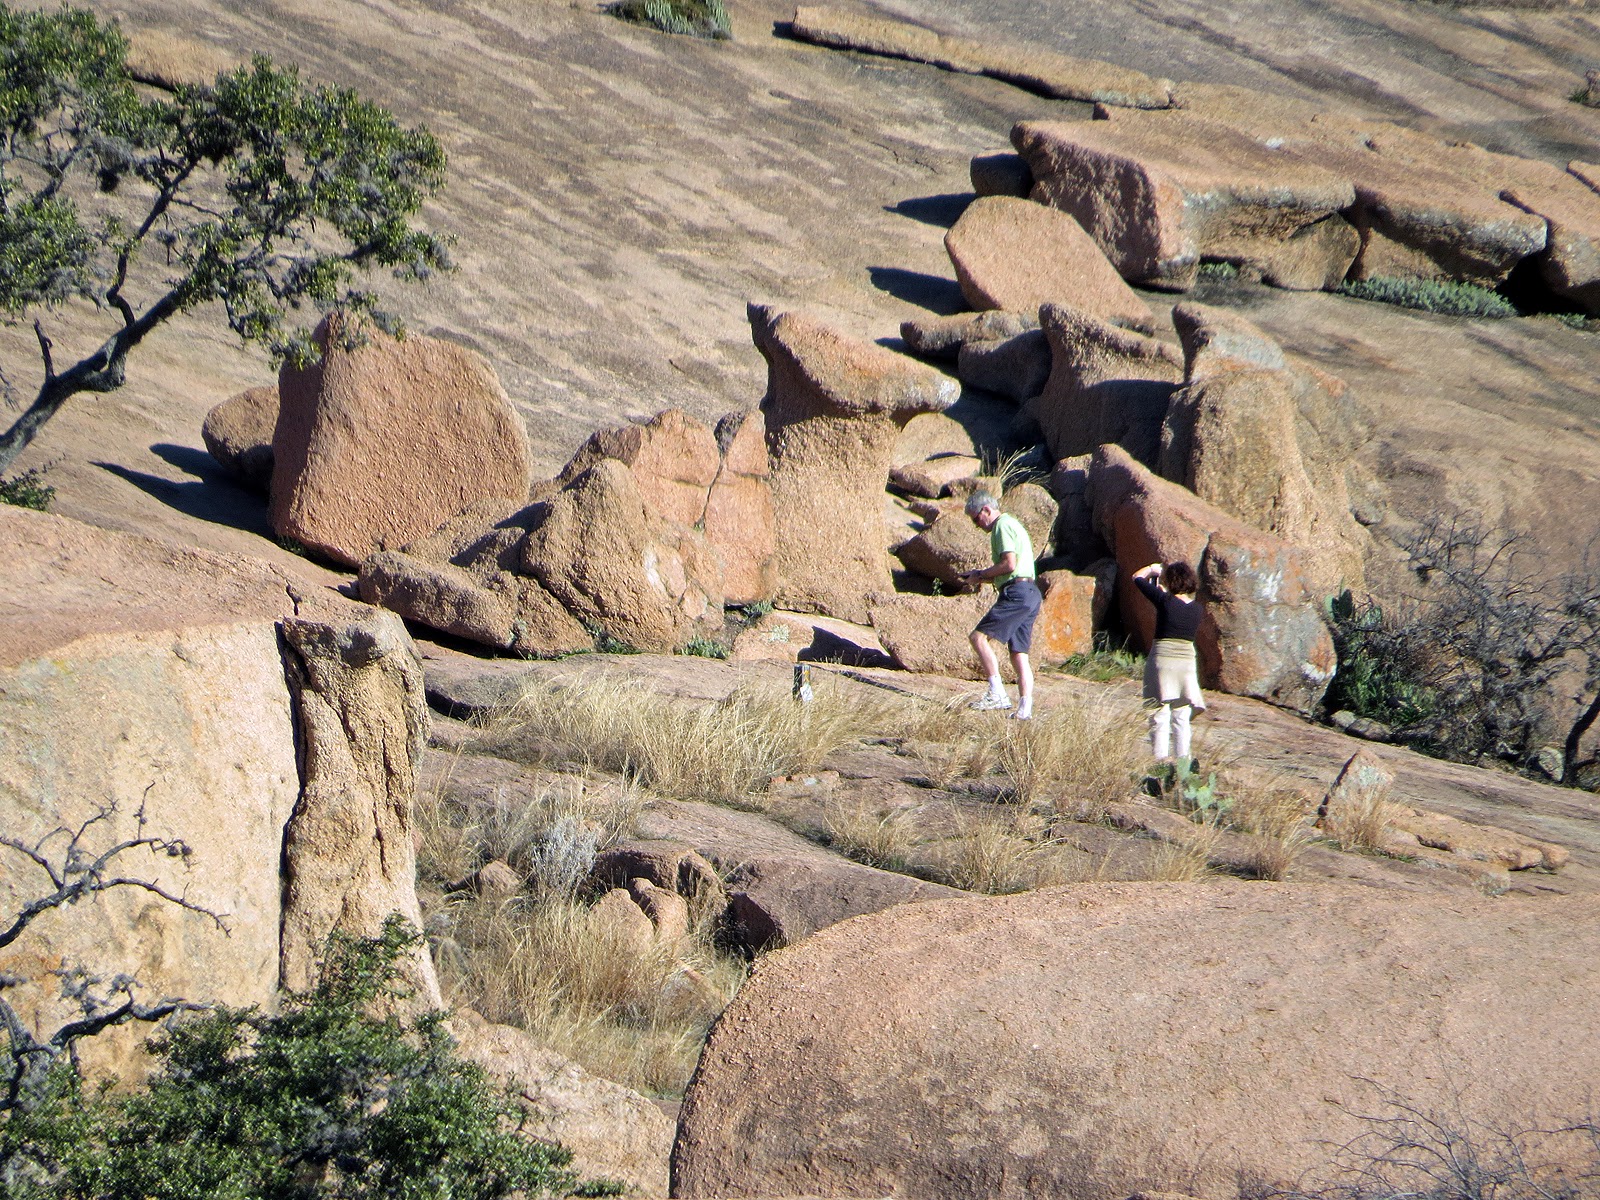
these hikers were. To get this shot, taken from the same spot and nearly the same time as the previous photo, I used a 1200mm lens.

The climb from gazebo to rock-top is approximately equivalent to 40 stories of stairs! As I was taking these photos a gentleman about my age dragged himself painfully up the last few steps past me and collapsed on a handy bench. He didn't look too good and sounded even worse! I don't know if he made it all the way to the top or not but whatever he did I'm pretty sure he was wishing he hadn't, and suddenly things weren't looking too good for me either at the moment!

 But being the intrepid soul that I am, (OK, some just call me stubborn and foolhardy but I've gotten pretty good at ignoring them.) onward and upward I went.


The footing is pretty secure (Though I might not want to try it in the rain!) and, though there are some dangerously steep areas up there, a little careful routing keeps you on more reasonable slopes.

It might look solid but the rock is actually layered like an onion and gravity is in the process of peeling these layers off one by one. In some cases, as in these two photos, the layers are only a few inches thick, but in other spots the layers are more like 10 to 15 feet thick. I imagine it would be a pretty spectacular ride to get caught up by one of these as it broke loose and slid down the dome, but fortunately that didn't happen, although, during the frequent breaks on my slow, slogging way up the rock, once in a while I could hear it tick and thump as it adjusted itself to the warming sun!


Oddly enough, on the summit are several patches of vegetation clinging, and I do mean clinging since can get windy up there! to the otherwise bare rock.


It starts with little depressions on the top of the dome, some of which will hold water for several weeks at a time and are called Vernal Pools.


Over time these start to fill in with vegetation and organic matter


until eventually there's a whole little habitat up there.


But it's clearly a harsh environment and I'm amazed that something could manage to hang on long enough to become as large as this before finally succumbing.


This habitat produces a unique version of fairy shrimp which attract birds,though on this day the smart ones stuck to walking since the moment they took to the air the wind blew them right off the rock!


Ladybird Johnson was instrumental in saving Enchanted Rock from a quarrying interest when it came up for sale in the 70's. This quarry, well outside the boundaries of the park, was visible in the distance from the top of the rock. Since it looks like there isn't any heavy equipment hanging around I would say the quarry isn't active anymore, but to the right were rows of blocks already cut and just waiting to be drug out of there for the next big building project.


At first this might look like a two-track off in the distance, but it's actually a pair of well used access roads bounding off across the hills on either side of a boundary fence.


Enchanted Rock is one of 4 or 5 distinct peaks in a cluster and this is the slightly smaller Little Rock photographed from the top of Enchanted Rock with Echo Canyon in between.


The 'trail' through Echo Canyon is more of a boulder scramble than trail, what with both peaks shedding their layers into the slot between them.


This is also where water tends to run which has formed a few of these hoodoo like formations.


The coarse, seemingly sterile top of this particular hoodoo was supporting small clusters of  garishly green lichens along with the more common grey lichens. They might not look like much but a patch of lichens a few inches across could be as much as 500 years old!


Enchanted rock isn't all about rock either. There are oak woodlands, mesquite prairie and floodplain habitats as well. With over a dozen miles of marked trails and plenty of off-trail opportunities, once I came down off the rock itself, I easily used up the day just wandering around the 1700 acre park.


And for those into that sort of thing, there are also nearly 50 named technical climbs within the park ranging from 5.5 to 5.11. If you don't know what that means my recommendation would be don't go climbing!!

I don't, and didn't.


Saturday, February 14, 2015

Are we there yet?!!


From the photo above you might think that all is peaceful, calm, restful, or any one of the other adjectives of quietude we are so fond of. You might think that I have actually arrived; but you would be wrong.

What you can’t see in the photo above are the heatwaves coming up off the still hot engine. What you can’t see is the matadorish slog across 50 miles of Metro-Austin crush it took me to get from there to here.  What you can't see are the ranks of big-box and strip centers and Mc-Mansion subdivisions with enticing names like Ledge Stone and Clearwater (Filled shoulder to shoulder with homes that for the next 50 or so years are destined to be mostly jointly owned by the banks that cater to our insatiable desire to outreach our resources!),  or the endless road construction and ranks of mindlessly malicious traffic lights that have to be negotiated to get here.

About 10 or 15 years ago Austin started showing up on ‘best places’ lists, and those lists are inevitably a death knell. As usually happens, many of the traits that got Austin on those lists in the first place were quickly squashed under the crush, destroyed by the very people that poured in to enjoy those traits, but apparently nobody has figured that out yet because they're still coming. Something like 100 new residents a day are thickening the sprawl.

I too once lived in such a place. I spent nearly 20 years living fairly comfortably and content in a quiet, eclectic neighborhood, a little self contained community in the middle of a major metropolitan area. But that was before the destruction. Once that dreaded word got out, once my little neighborhood started showing up in the Sunday supplements, the yuppies (Yeah, it was a while ago, back when yuppies ruled.) moved in and quickly destroyed all that had made the place unique. Suddenly, for every two 1920's brick duplexes built by the original Italian residents that were torn down five towering, garishly contemporary town-homes were shoe-horned in.  Where we used to have upwards of 100 kids and a dozen languages walking past the door in the morning on the way to the elementary school, now less than a handful of kids were left. We went from first-name conversations with the local homeless as they collected the aluminum cans we set out for them, to watching the scraggly old Vietnam vet that's been living on the local corners for years being ticketed by the police. They say it's because the aluminum cans he's been caught picking out of the garbage are property of the city, but we all know it's really because he's committed the horrible offense of sullying the view from someone's $500,000 third floor balcony

When we left under this onslaught we were sad for what had been lost, but eagar to get away from the ruins our neighborhood had become.
I think such devastation must be the nature of man, not necessarily the individual but the collective man, because this destruction of habitat happens time and time again. It’s probably why we're always trolling the media, looking for the next ‘best place’ list, but rarely satisfied once we get there.


But of course I’m part of the problem too! Not 10 minutes after I moved into this neighborhood, however temporarily, this poor Cardinal was reduced from going about his kicked-back Cardinal business to fiercely battling my mirror!


I tried clipping a couple spare dish towels over the mirrors but he just switched to fighting the reflection in the window instead!


This guy was persistent if nothing else. By the end of my stay the mirror was covered in Cardinal snot and I can imagine the poor, deluded warrior coming home every night exhausted from his battles but proudly proclaiming his victory and showing off the fresh chip in his beak to all the ladies.


OK, so I got a little side-tracked there, but my original point is that I ‘got here’, but now I have to get here. I have to shake off the frenzied pace of the ‘civilized’ world, I have to let go of the need to be constantly doing, to be 'active and productive', to be checking things off my list. I have to switch all that off and just kick back. I have to transition from ‘what am I going to do with the rest of the afternoon?, to ‘isn’t this nice, sitting here in the dappled shade with a good book and no immediate demands’.

So excuse me while I set aside this bit of technology, along with a few other accoutrements of modern living, and try to reboot myself to a quieter, more natural place.


Friday, February 6, 2015

When convenience attacks!! (The isolator failed - and not in a good way. . .)

Don't you just love it when a plan comes together? Me too. I just wish I could get one to come together once in a while. . .

Yesterday the plan was to head over to a friend's place to do some design work on a proposal for a contemporary, open-plan, steel framed house, but that was before the washing machine blew up and I had to deal with that instead.

This morning - well -  that didn't go as planned either.

I went out to the van first thing because it looks like we have a stretch of good weather coming, (Is it just me or has this winter sucked!!? Weeks of cold, and grey, and damp. I might as well be living back in Michigan!) and I wanted to hook up a 2 amp charger to the chassis battery which has been acting weird, i.e. voltage dropping by one or two tenths every couple days even though I have a 5 watt solar panel hooked up to it as a maintainer.

While out there on this, the first real sunny day in several weeks, I happened to notice the house-system solar panel was producing 3 amps. Now this was a bit strange since the van has been sitting there with all the house loads disconnected since my last trip way back in early December so I would have expected the house batteries to be well charged and taking 1 amp or less, even first thing in the morning.

A quick check of the E-meter confirmed my expectation. The house batteries were taking 0.5 amps. So where were the other 2.5 amps going??  Oh well, I guess the gardening I planned on doing this fine day will have to wait.

I checked to make sure I hadn't left anything on since - well - that can happen. . . But nope, nothing on.  Just to make sure, I hit the disconnect to positively kill all 12V power, but there was still 3 or so stray amps being sucked out of the solar and going somewhere.

For the past couple months I've been suspicious of the behavior of the isolator that keeps the house and chassis batteries separated unless the engine is running so that's the next thing I thought of. I dug around inside the driver's seat pedestal and pulled the 10 amp fuse so the isolator couldn't do anything but isolate, no connecting of anything with that fuse pulled. (At least that's what the manual says. . .) Except that while fishing around in there, very carefully since there's lots of 12V crap just waiting to reach out and grab me, I was surprised to feel a significant amount of heat coming from the isolator.

By significant I don't mean it was blazing hot or anything, but it was certainly warm when it shouldn't be warm, and that can't be good!

Donning leather gloves and taping up my tools, I very carefully disconnected and removed said suspicious isolator. I had been planning on doing this anyway, just not today. . .

Here I have the driver's seat pedestal opened up and the isolator that used to be in there disconnected and removed. I slipped a short piece of scrap PVC over the lugs on the main cables coming from the two battery banks and taped it in place to avoid any unnecessary fireworks while I was messing around.

Well look at that!!  With the isolator out the solar panel is behaving just the way it's supposed to! A half amp at 14V out of the panel and that same half amp into the house batteries.

Seems the isolator, which is supposed to provide the convenience of automatically looking after things for me, got bored with the same-ol' same-ol' and wandered off to try something different for a while with no thought at all about the consequences. It lawyer-ed up and wasn't talking, no signed confession today, so I don't know exactly what it was doing with those three amps, but I figure it can't have been good!

Since I already had everything opened up anyway, I went ahead and installed the alternative I'd been planning on putting in for some time now. A manual disconnect switch. Simple, reliable and cheap.

The old and the new. A $100, 200 amp isolator that went rogue, and the $10, 300 amp manual disconnect switch that will replace it. (I'm not really that bad a housekeeper, but when it's wet around here mud gets everywhere, which is why I have to carry a can of spot cleaner with me!)


I drilled a few holes for mounting the new switch,


connected up the cables and taped the crap out of them,


then mounted the switch, and buttoned everything back up again. The visible part of the switch is that short black, pipe looking thing right in the center of the photo.


The switch itself is dead simple. (Hence the low price!) Basically it's just a big,  momentary push-button switch you can find at any decent auto parts. So that you don't have to stand there and hold the button yourself, it comes with a red plastic key (Two actually, in case those that tend to lose things were worried.) that you push in and twist a quarter turn to lock it.

Of course the thing about manual is that you've got to remember to do - well - the manual part. And frankly I don't see my memory getting any better as time goes by, so to reduce the likelihood of  connected the two battery systems together then getting distracted and wandering away like I know what I'm doing, I simply put an absurdly long loop of brightly colored twine through the hole conveniently provided in the key.When the key is in the switch I can drape the string across the couch where I can't miss it, or even better, hook it over the armrest of the passenger seat where I'll trip over the dang thing!

Now all I need to do is make sure that chassis battery has a good charge in it so I'm ready to head out into a great looking forecast as soon as the weekend crowds dissipate into the work-a-day week. (Damn I like being retired!!)


Tuesday, January 20, 2015

The Yin & Yang of the Belt


You would think mornings like this, when I have to take in another notch on the belt that's keeping my pants from falling down around my ankles, would be a time for celebration,


but anymore that celebration is tempered by experience. Painful experience that's taught me that no matter how much I resist, no matter how stubbornly I try to hang onto that hard-gained notch at the expense of restricted breathing and an angry red welt by the end of the day, I'm going to have to give it up again at some point in the next couple months. I'm going to have to deal with the disappointment of settling back into to my normal, for-God's-sake-stay-off-the-scale!, notch again.

The laws of physics dictate that the Universe demands balance in all things; that for every Yin there is a Yang. And through repeated lessons I've learned that for every notch taken up, every Yin gained, Yang (That bastard!) will soon demand equilibrium and my transverse girth will eventually return to it's natural state.

I'm especially cautious this time since we've just been through over a month of holidays, holiday food binging and cold, wet, grey-skied weather (Definitely not normal around here!) that has put a crimp in the camping, hiking and other fat burning activities. Which leaves me wondering if having to take up that notch this morning has more to do with increased downward force from a  dun-loping belly combined with old man flat-ass and little to do with loosing any actual ballast.

So any celebrations are currently on hold. . .


Sunday, January 11, 2015

What If: Variations


OK, as I stand here at my workstation out in the (Unheated) barn with all the doors closed because of the 35 degree rain that's falling outside, which is definitely not helping  motivate me to do much of anything else, I'm finally getting around to wrapping up this series of What If posts.

As I worked on this project I wandered off the path a few times (remember this post? Just like when I'm hiking, even with a map to follow I still tend to wander off the trail. . .) and came up with some variations on the design, a few of which I'm going to lay out here whether you want me to or not!!


Tea; and sleep; for two:

The obvious variation is jamming in sleeping space for two. But, even though I briefly gave in to temptation during the design phase, I'm not going to go there because it was just so predictable and boring and blah. (I know, I know, boring and blah are redundant, but so were the results of that brief detour so it warrants being repeated.)

Fitting a double-wide bed into the camper turned it into pretty much any other generic 9' camper you can buy off the lot. It created a space that was cramped and uncomfortable and doesn't function all that well in any of it's modes; drinking, eating or sleeping. (Iconic small boat designer Phil Boldger often said the ideal boat would drink 6, eat 4 and sleep 2; I guess he was more sociable than me. . .)

Anyway, wandering off down this path dragged the camper far from the customized, fits-me-just-right result I was looking for, so I came to my senses and abandoned that route and deleted those scribbles, but there were a few other variations that I followed through on and kept.


Alternative bed/chair setup:

I couldn't quite leave my original bed/chair idea alone and ended up creating this alternative,


which is a scaled down version of the venerable dinette.

If you recall, because of the height of the pickup bed rails, a layout such as this puts the seat too high for comfortable sitting. I got around that by installing a raised floor for my feet to rest on. There's storage space below this floor where I can keep some books and other heavy stuff and it has been designed to be lifted out easily for better access, though I'm not sure that will be necessary, except maybe for sweeping.


Like a typical dinette, it can be converted into a bed, but instead of using the table as a filler over the foot-well, the cushion that is otherwise the back-rest is mounted to a board so it's cushion and filler all in one.


This board, along with a couple of rub-rails mounted on either side of the escape window, keep the cushion from flexing outwards and pressing up against the escape window when sitting back against it.


To get the table out of the way for sleeping, since it's not going to be used as part of the bed, it hinges upwards and is held there by a simple latch. It does make getting into the 'fairing' storage more challenging but then what's life without a challenge or two?? This setup has the added advantage of easily getting the table out of the way when just lounging around or trying to put your socks on, something a typical dinette isn't very good at.

I had to reduce the size of the cupboard over the seat to make sure there was enough headroom to avoid head trauma, but only by a few inches in height and depth.


Turns out that even though the seat might not be as comfortable as my original idea with an Adirondack inspired semi-recliner, I really like this setup, probably because it reminds me of when I was a kid and family regularly gathered around the dinette in one or another of our old trailers.

The pop-up:

The pop-up strategy is one I've used before, three times before if my memory is holding up.

The concept is simple. When parked the top is lifted to provide the headroom and space necessary for civilized hanging-around. When going down the road the top is lowered so you're not dragging extra air from one place to the next. This works out pretty well because, generally speaking, there will be plenty of air waiting at the next campsite anyway.


On the left (In case it wasn't obvious.) is the camper in the raised position. In this configuration it has the same headroom as the original fixed-height version though less storage. On the right the lid is lowered and the camper is road-ready. (As long as I remember to close those two vents first!!)

I don't know about you, but for me this version just begs for a big, beefy, macho 4-wheel drive truck under it for climbing mountains and bashing through the woods.

Implementing this version takes a bit more thought and work but not as much as you might think. (But you shouldn't trust me on that since I've done this before.)


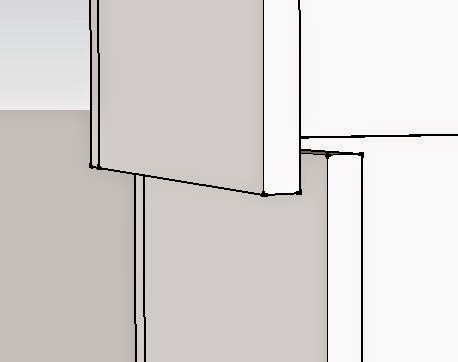
By slicing the camper shell in two horizontally and pulling all four walls of the upper section 2.5” further out, (The walls are 2" thick so this give a half inch clearance all the way around.) the upper section now fits over the lower section like a shoebox lid; a lid that can be lowered by 23” for slipping down the road as easy as snot through a 2 year old.


By extending the walls of the upper section downward, I've also created a 2" overlap between the upper and lower sections when in the raised position to improve overall stability and weather sealing.

Weather sealing is done with brush seals, like those used along the sides of commercial roll-up doors. I didn't bother drawing them in but by putting one seal on the top edge of the lower section brushing against the inside of the lid and another on the bottom edge of the upper section brushing against the outside of the lower box, you get a double seal that will still slide easily during the raising and lowering process.


To make sure everything stays lined up where it’s supposed to be, I would use heavy-duty stainless steel drawer slides (Which just happen to require that same half inch clearance I left between upper and lower sections. See how neatly things work out!) with the fixed portion mounted vertically on the outside of the lower section and the mating sliding portion mounted to the inside of the upper section.

A pair of these slides mounted on either side of the door will ensure the door-jams stay lined up where they belong as well as keep the rear of the upper centered side-to-side over the lower section. And one slide each just behind the windows in the side-walls will help ensure the long walls of the upper don’t bow outward, (Though they are already pretty well braced by the full length upper cabinets which I'll get to in a moment.) as well as keeping the lid centered front to back. And one more slide in the front wall will keep the front of the two sections centered.


I prefer this 'box lid' approach as opposed to raising just the roof and filling in the gap with canvas for a few reasons. Insulated hard sides - well - insulate better than canvas; Bears find the hard sides more difficult to claw through than canvas when they're trying to get to the cookies; The hard-sided version is a little more stable than canvas sided when raised, something to consider when facing storms up there on top of the mountain where that macho truck got you.


Some additional modifications to the design are required to make this whole thing work, but maybe not as many as might first appear.


On the exterior the ‘fairing’ on the front of the camper is eliminated, along with the storage it provided. (It would just come down and crush the pickup cab otherwise. . .) So that there is still a little bit of aerodynamics involved, I angled the front portion of the roof down to within a few inches of the truck-cab roof when in the lowered position. This doesn't hurt anything (Other than a slight loss of storage space in the upper cabinets.) since you can't stand up in that portion of the camper anyway.


And the lower door opening  is narrowed by a few inches so the lower door can swing open past 90 degrees before hitting the edge of the upper door opening.


As you might imagine, a few changes need to be made inside as well.

 The cabinet over the refrigerator has to go so there’s room for the lid to lower. This leaves a large shelf on top of the fridge that can be used with the lid up but must be emptied before lowering the lid unless you've got something you want to crush. I extended this shelf all the way to the rear wall and mounted a couple wire drawers next to the fridge to recover some of the lost pantry space.


The hanging space opposite the fridge had to be eliminated for the same reason. I put a couple wire drawers into the remains of the closet space for storing folded clothes.

In the two previous images you can also see that I have extended the upper cabinets the full length of the camper shell on both sides. I had to reduce the top to bottom dimension of the uppers by 4" so they would allow the top to go all the way down, but was able to make them 2.5" deeper from front to back, so recovered a little of the lost storage space. These full-length uppers contribute greatly to the structure of the upper part of the shell, stiffening the side wall and bracing the roof, and are designed to rest on the top edge of the lower section when in road mode, which helps stabilize everything for the twists and bumps of less than perfect roads and take the load off the actuators. (Relax, I'll get to those in a moment.)


One casualty of this version is the air-conditioner I so carefully designed in in the first place. There's just no wall space left to accommodate that through-the-wall unit in this pop-up version. I did draw in a second roof opening that could be used for a traditional RV type air-conditioner but I can’t help envisioning this rig on top of a burly 4-wheel drive truck clawing it’s way far into the back-country where shore power to run an air conditioner is never to be found, so I put a second vent into the opening instead.

The faucet also needs a little thought. With less than 6" between counter top and upper cabinet when the lid is lowered, a traditional sink faucet isn't going to work. A vanity faucet would fit but make it difficult to fill anything other than a coffee cup. Short of sourcing a very expensive fold-away faucet, (They can be found on the European market if you must have one.) an alternative that I like is to simply replace the faucet with a kitchen spray head instead. You know, that little thing to one side of a normal kitchen faucet that’s attached to a flexible hose and pulls up out of the countertop when you need to use it. That way it clears the uppers when in road-mode since the spray head is only a few inches tall, but I can pull it up as high as I need to fill a container or pot.

Getting the lid to go up and down would be the job of some linear actuators. I’ve used both hydraulic and electric in the past and though hydraulic worked just fine, electric is my preferred type since I already have an electrical system on board. And screw type electric actuators are going to stay wherever they are left so there’s no need for safety pins or latches as there would be with hydraulic actuators.


 A pair of actuators (I've colored the actuators red in these raised & lowered images to make them more visible.) would be placed in the rear corners of the shell and another pair in the front corners of the under-counter cabinets. (With the roof angled down for aerodynamics there's not enough height left to fit them in the front corners of the shell.) These actuators will need to go up through the bottom of the overhead cabinets all the way to the ceiling, but they will be right at an internal partition as they pass through so won't be in the way too much.


So, some compromises, but if I decide I need a lean, mean, back-country version of the camper, there it is.

The throwback:

If done right, ugly can be beautiful, but I'm not on par with designers like Wright and Boldger, so my ugly tends to be just that; ugly. Which is incentive enough to try gilding the lily. As additional incentive, as I was working on this design I saw several vintage trailers being restored; so I just couldn't help myself,


and ended up creating my own version of a retro-ized camper.


The only change to the interior is to modify the outside top corners of the cabinetry to the new shape of the shell, and eliminate the upper over the seat, (It just got too small to be useful, especially after I lowered the roof by several inches to get that old-time feel to the overall proportions.) everything else can stay the same.


Final words:

So there you have it, this project from start to finish. At least the finish of the design phase. If I ever need to implement my What If option I can dust this off and build it. And I think I would build the Retro version with the dinette type seating/bed, even though it would be more complicated than the straight-sided version because of the angles and additional panels, but what the heck. . .

Oh, by the way, as I was working on this design I wandered into my enclosed cargo trailer several times and I got to looking around and thinking about layouts and - well - that's for another time. . . maybe.